
Breaking Photography Boundaries
breaking rules and the boundaries that come with them is a quintessential aspect of art ‘the expression or application of human creative skill and imagination’. Imagination should not be bound by pre-conceived notions placed upon an artistic pursuit by others.
One photographer who understood this perhaps better than many was the American photographer William Eggleston.
For many the rules of photography are set in stone, there to be conformed to, things must be ‘correct’. Exposure, composition, aperture, focal length, everything has a right or wrong way of going about it. Landscapes must be photographed in ‘landscape’ orientation, portraits in ‘portrait’. Rules of thirds or golden ratios must be respected at all times and woe betide anyone who captures a portrait at f/16.
But breaking rules and the boundaries that come with them is a quintessential aspect of art ‘the expression or application of human creative skill and imagination’. Imagination should not be bound by pre-conceived notions placed upon an artistic pursuit by others.
One photographer who understood this perhaps better than many was the American photographer William Eggleston.
In the mid 1960’s colour photography was in its infancy and there were few photographers who did more to push forward its use than Eggleston. Coming to prominence photographing the ordinary in a way few had seen before, he broke many of the accepted norms of the time. And whilst it’s now hard to imagine a time when using colour film was considered transgressive, 60 years ago that was indeed the case.
Amongst the photography elite, colour was considered vulgar.
Despite struggling to achieve acceptance, Eggleston continued his exploration of colour photography over the following decade. His steadfastness culminated in a 1976 exhibition at the Museum of Modern Art in New York. He rather provocatively titled it ‘Color Photographs’. Amongst the public, it was a huge success.
However, whilst breaking boundaries had delivered the elusive gift of recognition, it had not delivered acceptance amongst his peers. Amongst the photography establishment, Eggleston’s work was negatively reviewed and both his vision and style were dismissed and scorned. There were even calls for his exhibition to be pulled from display.
Perhaps the most established and prominent photographer in America during this period was Ansel Adams. Adams had become part of the photography elite, many might suggest that he had become, by this point, the self appointed ‘establishment’. A considerable talent, Adams was front and centre of American landscape photography and, by the time of Eggleston’s exhibition in 1976, had a amassed huge sway with the media, public and indeed, the Museum of Modern Art.
For Adams, the idea of this photographer having an exhibition made up of colour photography was just too much. To him, the use of colour film was an outrage. Not for the first time in his career (look up William Mortensen for another example), Adams decided to put his influential weight behind a movement to ‘cancel’ a photographer whose work he didn’t agree with. Famously penning a two page letter to John Szarkowsky, the curator of the exhibition, he heavily criticised Egglestons work and the museums decision to exhibit him. Pouring scorn he declared that Eggleston was nothing but a ‘put on’ and his work was ‘of the worst kind…..of no substance’.
The media critics agreed and Egglestons exhibition was labelled ‘perfectly banal’. But this did not translate to the public. The establishment becoming further riled when the exhibition grew in popularity amongst the public and celebrities of the day.
Eggleston rode this wave of criticism with dignity throughout and only publicly commented when asked directly. In his later years (he’s still going strong btw) he retorted that if he’d ever met Adams he would happily have told him that he ‘hated his work’…but he would have said it ‘to his face’…..a swift dig at the fact Adams never gave his critique to Eggleston himself.
Despite all furore, the exhibitions huge public success meant that Eggleston now found himself being invited to the top table of photography. Wined and dined as somewhat of a celebrity, it seemed that he had swam to clearer waters. The criticism and personal put downs weren’t over yet though.
One of Egglestons photographic idols was Henry Cartier-Bresson, he of the decisive moment, the 1952 book which Eggleston had read numerous times. At a dinner in France, Eggleston got to dine with his idol at the same table. I can only image how this prospect must have been. By this time, Eggleston was mixing it with the luminaries of the photographic world, but dining with one of your photographic idols; one of the men who inspired you and through whose teachings you learnt. This must have been a big deal.
Shortly into proceedings, and after some initial chit-chat, Bresson leaned over to Eggleston and said ‘William, colour photography is bullshit’.
Imagine how this must have felt. Not only had Eggleston had one of Americas most famous photographers writing letters to demand his work be pulled from exhibition. He now had his photographic idol look into his eyes and tell him that his work, his style, his observations, his voice, were nothing more than bullshit.
That must have been a bitter pill to swallow. But Eggleston did Eggleston and continued to stay true to himself photographing his story his way.
Many years later, Eggleston recalled his reaction to this slight from Henri Cartier-Bresson, ‘I stood up, left the table, and had a great night partying with a young lady, she didn’t question colour photography once’.
50 years on the conversations have (mostly) moved on from whether colour photography is acceptable for serious photographers. But the willingness of the photography community to critique and slate other photographers work, their passions, their vision and style, has not. It can be easy to believe this is a modern day internet based phenomenon. But as William Egglestons story nods to (and to a larger degree William Mortensen’s), this has been going on for as long as photography. The pictorialists of the early 1900’s quick to dismiss documentary, or modernism photography. The modernists quick to pour scorn back onto the pictorialists. The technicians readily available to point and shame those who don’t conform.
William Eggleston didn’t conform and is just one of many photographers we can learn from. His demenour in the face of an onslaught of criticism is to be admired. He shrugged it off and continued to embrace the telling of his own stories.
It’s easy to forget when faced with negativity and criticism (or even a lack of likes and hearts under a post) that we do not have to conform to other photographers opinions of what is right or wrong. But getting comfortable with the fact is of great importance.
Time has demonstrated that Ansel Adams, Henri Bresson and the other critics were wrong about William Eggleston and his use of colour. And whilst both were themselves boundary breaking photographers, we should learn from their fabulous photography but also from their mistakes. They were both wrong to decide that other photographers were of no value.
So, the next time you face adversity in your photography, be more Eggleston….Stand up, leave the table and party with those willing to push you forward, and not spend too much time with those wishing to pull you back.
Everybody can conform, it’s the boundary breakers that become legends.
See William Eggleston’s work: EGGLESTON ART FOUNDATION
Dave Laffan
Let’s Click Photography

Why Learning Photography on YouTube is Hard
Why Learning Photography on YouTube is Hard
In this video, the photographer discusses the accepted stages of learning different skills within photography. You can find the link to the video at the foot of this page, but firstly here are the key themes and takeaways:
Why Learning Photography on YouTube is Hard
In this video, the photographer discusses the accepted stages of learning different skills within photography. You can find the link to the video at the foot of this page, but firstly here are the key themes and takeaways:
1. The Four Stages of Learning:
Unconscious Incompetence: A state of blissful ignorance where one doesn’t realize their lack of knowledge or skill.
Conscious Incompetence: Awareness of one's lack of knowledge, often accompanied by frustration or unhappiness, as the individual realizes the gap between their current abilities and their goals.
Conscious Competence: The stage where one develops skills through effort and repetition but still requires deliberate focus to perform well.
Unconscious Competence: Mastery, where skills are second nature, and one can perform proficiently with ease.
2. Learning is Non-Linear:
Progress involves a cycle of steps forward and backward, requiring patience, persistence, and acceptance of setbacks as part of the growth process.
3. Limitations of Over-Reliance on YouTube:
While YouTube offers vast resources, it is limited by its algorithm, which often reinforces familiar topics instead of challenging users with new or diverse perspectives.
True growth often requires stepping outside of algorithmic recommendations to seek out new ideas, techniques, and concepts. Even learning new concepts and ideas from genres outside of your usual photographic pursuits.
4. The Value of Discomfort in Learning:
Growth often necessitates leaving the comfort of blissful ignorance and confronting the discomfort of conscious incompetence.
This discomfort is essential for true learning and improvement, despite its initial emotional challenges.
5. Lifelong Learning Mindset:
Learning is a continual process; even at advanced stages, there will always be areas where one is unaware of their ignorance.
Embracing this process keeps the journey exciting and fulfilling.
Key Takeaways:
1. Progression Through Learning Stages: Accepting and moving through the stages of learning is critical for skill development and mastery. Each stage has unique challenges and rewards.
2. Embrace Discomfort: Acknowledge that feeling incompetent is a natural and necessary step in the learning process.
3. Be Aware of Algorithmic Echo Chambers: Over-reliance on platforms like YouTube for education can lead to stagnation. Seek diverse resources and experiences to break free from repetitive content.
4. Learning is Cyclical, Not Linear: Expect to revisit earlier stages of learning as new challenges arise; this is part of continuous improvement.
5. Maintain Curiosity and Openness: Welcome opportunities to learn what you didn’t know you needed to know, as this fuels growth and innovation.


A Guide to Landscape Photography and Light: Section 1 - Quality of Light
Photography of any kind begins with light. Light is the key fundamental. It is our raw ingrediant as photographers. Whilst Landscape Photography doesn’t allow for us to change the light on a whim, we can still take control of it through our understanding of how light will impact our landscape photographs......

Golden light over the Great Ridge at Mam Tor in the Peak District, UK. But is it hard light or soft light?
Photography of any kind begins with light. Light is the key fundamental. It is our raw ingrediant as photographers. Whilst Landscape Photography doesn’t allow for us to change the light on a whim, we can still take control of it through our understanding of how light will impact our landscape photographs.
Light creates visual mood and atmosphere within our photographs. It’s also responsible for texture, contrast, yes even ‘sharpness’. By understanding a few key principle of light, we can start to take control and determine the impact of light within our photographs. And we’re starting with what is referred to as light quality.
All light is good light.
When photographers refer to the quality of light, we are not using the term to descern good or bad light. We are referring to the quality of the light as being hard or soft. Quite often photographers will also talk about things like diffused light or specular light, golden light or flat light. However these terms are not qualities of light and we will cover them in further sections.
There are two qualities of light: hard light and soft light. But these are not as defined as you may think. In fact, quite often the quality of light is termed in reference to the other, harder or softer. And there are gradations in between the two.
What defines hard or soft light?
In simple terms, hard light produces harder, well defined shadows with high levels of contrast. Soft light at it’s softest will produce little to no shadow with much reduced contrast.
It is the transition between highlights and shadows that is impacted by the quality of light hitting your subject. This is why recognising the quality of light you are photographing in can make a huge difference to how you photograph.

The sun shining down like a spotlight over the Lake District, UK
How is soft light or hard light created?
Light quality is determined by the size of the light source relative to the subject being photographed (the key word here is relative), the larger the light source, the softer the light.
As landscape photographers, our light is sent from the sun and the sun is huge. It’s so big that it would engulf the earth 1.3 million times before being full, that’s pretty darn big! So that must be a soft light then? As mentioned above, the key word is ‘relative’.
The sun sits more than 150 million kilometres away from the earth, so whilst it is unimaginably huge, it is also unimaginably far away. And from our perspective here on earth it actually appears quite small. An easy way to understand this is if you hold out your hand at arms length in between your eyes and the sun. Your hand easily covers it. So despite it’s super huge size, the distance makes it, relative to our perspective, fairly small.
And that’s the reason that the sun is a small light source producing hard light for most of the day.
MOST of the day?
Earlier in this article I wrote that our light for landscape photography is ‘sent by the sun’. I wrote it this way on purpose because, to understand how we get soft light, we have to stop seeing the sun as our only light source.
The softest light we are likely to achieve in favourable landscape photography conditions comes during a time frame known as blue hour. Blue hour exists for a short time before sunrise and after sunset (mostly for much less than an hour!) and occurs at a time when the sun is below the horizon and we are no longer receiving rays of light directly from the sun onto the land. But we do still have light.

Blue hour in the Lake District, UK. With very subtle highlight to shadow transition, this is a great time of day to photograph under soft light
So what’s the source of this light?
Despite the sun being below the horizon, its light rays are still hitting our atmosphere and these light rays get reflected down onto the land below it. In this respect, the atmosphere has now become our light source. And, as the earths atmosphere covers the entire sky above us, it is a much larger light source than the sun. Hold your hand up again at arms length, you can still see the sky all around it right?! That’s because, relatively speaking, it is much bigger than the sun.
It is because of this relative large size that we get soft light with soft shadows. The larger light source is reflecting light in multiple directions and it is those multi directional rays that create much softer light than at any other time of day. The light ‘wraps’ around the land, reducing shadows and contrast.
Cloudy Day? Soft Light!

Cloudy skies. Note the dimished power of the light, also the lack of any hard shadows and reduced contrast in the image
Now transfer this idea to a cloudy day. Forget the idea that the clouds are ‘diffusing’ the light. If we can’t see the sun then the clouds are the light. And if the clouds cover the entire sky then they are a large light source producing soft light. Again, full cloud cover will create multi-directional rays to wrap around the land removing shadows and decreasing contrast. They also diminish the strength of the light.
Above the clouds, the sun is streaming down its rays in the same way and at the same ‘power’ it always does, it is the clouds that reflect some of that light back, reducing the light making it down to us on the land. This will mean that our camera settings need to change to take that diminished light into consideration.
Hard light, Soft light.
We now know that the sun produces hard light whenever it is the only (or most powerful) source of light. But we also understand that when the sun interacts with things closer to earth such as our atmosphere or weather conditions, and we can no longer see direct sunlight, that they become the relative light source.
Right at the start of this article I stated that neither of the qualities of light are definites. That’s because they are relative terms. Even when the sun is at its highest point in the sky, on a clear sky day, its rays are still interacting with our atmosphere, they are still reflecting, defracting and bouncing. That is why we can still see into shadows and it is why, even on the sunniest of days, we still never get a completely defined shadow line. You can actually produce a much harder light in the studio where light bounce and reflections can be controlled and minimised.
And whilst blue hour produces beautifully soft light, by definition, there is even softer light to be found on a moonless night. There is zero transition between highlights and shadows then, because there are no highlights.

A cloud inversion from above looks marvellous and sunny and we can see the reflected light coming back off the clouds and the swift transitions from highlight to shadow caused by the hard light of the sun. The town underneath the clouds will be much darker with super soft shadows due to the cloud coverage acting as the light source.
So the qualities of light are interchangeable even in the landscape. Light quality is harder or softer only in relation to itself.
The harder the light, the more defined the shadows, abrupt transition between highlights and shadows and therefor stronger contrast.
The softer the light, the less defined shadows, smoother transitions between highlights and shadows and lower contrast.
In section two we’ll be discussing the qualities of reflection and how to harness their impact upon your photography. Make sure to sign up for the newsletter below.
Dave

One Day In The Peak District
One Day In The Peak District. An itinerary of landscape photography locations in the Peak District if you only have one day. One Day in the Peak District blog includes parking locations via Google Maps plus timings and insights into each Peak District photography location visited

Doxy Pool atop The Roaches. An older shot of one of the landscape photography locations visited during my ‘One Day in the Peak District’. Why an older shot,? Find out below.
An itinerary of landscape photography locations in the Peak District if you only have one day. Including parking locations via Google Maps.
A friend of mine rang last week. After a bit of a chat he told me that he and his girlfriend were going into the Peak District over Easter and asked where I’d recommend going. They had one day off together and wanted to see as much as possible. I made a few suggestions and we put together a plan, this was mainly sightseeing rather than photography. After the call finished though, I got to thinking, ‘if I was a photographer who had just one day in the Peak District, where would I go and what would I photograph?’.
So on Tuesday, I woke up with no jobs booked in for the day (processing can wait, right!), and with this thought in mind, I set off at 6.30am to head into the Peak District to see what I could fit into just one day.
I had no real plan, other than a general idea for a first destination. Weather dependent I’d either stop at Mam Tor or head to Padley Gorge. About 40 minutes into my drive, a few miles shy of Mam Tor, I could see that the weather wasn’t looking great and there were grey clouds overhead, onwards to Padley Gorge then.

The bridge over Burbage Brook

Gateway to the Gorge
8am: Padley Gorge (Parking Location - https://maps.app.goo.gl/Pat3rT23FgkWkhyCA)
It was still fairly dim when I arrived at Padley Gorge. The grey clouds above had started to drizzle and with only one other car in the parking bays, it was obviously quiet. So quiet in fact that I only saw a couple of dog walkers during the whole walk through Padley, although by the time I’d get back to the car, there were a few more parked up.

One of the only people I saw that morning in Padley Gorge
There’s loads to photograph in Padley Gorge. You could take a full day here and still not photograph everything that you wanted to. But, this morning, I just wasn’t feeling it. It was a flat morning, no interplay of light and shadow, no colour other than green, no mist or fog to create some fantasy, just pretty bland.
Of course, I still had my camera in hand as I walked through the woodland, grabbing a few shots as I went. The water of the brook was in full flow and there’s loads of mini waterfalls, and a couple of larger ones too, but again I just wasn’t feeling them this morning. Nevertheless the walk was still an excellent one, I made it down Burbage Brook to the cut through to Bolehill Quarry before circling round and heading back up the higher shelf and hitting the trail back to my start point.

You could extend the walk through Padley Gorge to take in Bolehill Quarry too

The gate through to Bolehill Quarry. Not one that I went through on this day, but worth a visit it you have the time.
Not a great start to the day photography wise, but still a mesmerising place to visit and a good bit of exercise to get my day started. As I arrived back it was still only 10am, so I poured myself a coffee and had a glance at the map to find my next destination, a place I’d only ever visited once, a very long time ago, a place with some tales to tell and some history to document.
11am: Magpie Mine (Parking Location - https://maps.app.goo.gl/Sp2SQc1Befz9kiZS6)
If Magpie Mine had a coffee shop, some toilets and better parking, I’m pretty sure this would be a coach tour magnet. As it is, it doesn’t, so it isn’t. All the better for me then! Parking roadside I walked the couple of minutes down the drive to the site of the old mine. There’s some information boards scattered around the place telling the tales of the mines and some really interesting history - I love a bit of history so places like this are fascinating to me.

There are plenty of information boards to tell you what each building or piece of equipment were used for at Magpie Mine
By now, the sun was well up in the sky but the weather was all over the place. Dark clouds one minute, bright blue sky and white clouds the next. The constant however was haziness. It was really hazy, which would remain the case throughout the day, and the light that was hitting the landscape was specular. In retrospect I should have been walking round with a poloriser on the front of my lens but I wasn’t really thinking about it at the time, this trip was more about the journey than the photography.
I left the car with just my camera and 16-35 lens, figuring that I’d just head back to grab something different if I needed it. I didn’t. The few shots here were all taken with that combo and I felt was enough of a haul to have warranted the journey, nothing great but a nice photographic story from this leg of my one day in the Peak District.

The wind was high and the clouds were ever moving.

The old lead mine still has plenty of rubble piling high
If you were heading here for some serious photography then the mine shafts and chimneys make for a lovely foreground for some astro-photography and there’s some lovely documentary style photography to be had too. This is a good stop for history buffs and you might give it 90 minutes to 2 hours here, for me, I’d seen it before so an hour was sufficient. It was lunch time, so time to head off to a scenic vista to make my pot noodle, another coffee and fuel myself up for the afternoon.
12.30pm: Monsal Head (Parking Location - https://maps.app.goo.gl/X1XR1rAZeU9J2rmi6)
Having photographed Monsal Dale and the Headstone Viaduct twice before, I didn’t even take my camera out of the car this time around, the shot here is from my phone. But it’s a lovely view and there’s plenty of benches to sit and have lunch looking out over the view below.

A quick iPhone shot. A lovely view to have whilst lunching.
Although Monsal Dale is a site of scientific special interest, the view is dominated by the viaduct. A source of great controversy when it was built in the mid-1800’s, it was described at the time as ‘defiling the Dale’. Built to carry rail line to connect Buxton to Bakewell it’s now fully paved and forms part of the Monsal Trail. The Monsal Trail is a traffic free 8.5 mile stretch for walkers, runners, cyclists, horse riders and wheelchair users. It utilises the old rail route and walking the trail will take you through the old tunnels that run under the hilltops.
The Dale itself is beautiful and the River Wye which runs through it is home to loads of species of life. Well worth a trip but for me on this occassion, with lunch and coffee consumed, it was onwards to my next destination. A place I had never been before and I was looking forward to having a good explore of the rather quaint little village only a mile or so from Monsal Dale.

Peak District Desktop Wallpaper Collection - 4k
Bring the breathtaking beauty of the Peak District National Park to your digital world with this exclusive collection of 15 desktop wallpapers. Carefully curated, each of the 15 wallpapers capture the beauty of the Peak District, showcasing its rolling hills, rugged landscape, and picturesque woodlands in stunning detail.
Featuring Photography from:
Bolehill Quarry, The Roaches, Mam Tor, Derwent Valley, Higger Tor, Curbar Edge and more
High-Quality Resolution:
Each image in this collection is professionally photographed and optimized for high-quality display on a variety of desktop or laptop screens in a 16x9 aspect ratio. This pack is sized for 4k monitors (for HD monitors, see the available HD Pack)
Embrace the natural splendour of the Peak District:
Elevate your digital environment with 15 stunning landscapes and woodland wallpapers from the Peak District UK. Whether you're a nature enthusiast, a photography aficionado, or simply appreciate the allure of captivating landscapes, this desktop wallpaper collection offers a window into the timeless charm of one of England's most cherished destinations.
Experience this beloved national park, and redefine your desktop aesthetic, with the timeless appeal of the Peak District UK in 4k definition.
1.45pm: Ashford in the Water (Parking Location - https://maps.app.goo.gl/ssAyg6UCvmQGTQQD6)
The River Wye runs down from Monsal Dale through Ashford in the Water and as I’d been driving from Magpie Mine to Monsal Head for my lunch, I’d spotted some lovely looking daffodils blooming on the river banks. Had I not, I probably wouldn’t have called into the village. But I’m glad I did.
What a quaint little place. I had a wander around the church yard, with it’s gravestone marking those who had lived in the village hundreds of years past, through a recreational area, complete with ‘netted’ goalposts, something that would never be left out in the city (if you want nets in a city park, you have to buy them yourself), and eventually finding myself at the beautiful Sheepwash Bridge, the place I had fleetingly spotted from roadside.
I grabbed my camera from the car, again just camera and 16-35mm lens and spent no more than five minutes photographing. I’ve seen shots of the bridge before, and whilst it’s lovely, there was nothing new I was going to capture today, but the daffodils only bloom for a few weeks of the year so including those would give me something timely to add to the story of my day.

Sheepwash Bridge. The name should be taken literally as this bridge was used to herd sheep to have their fleeces washed.
I grabbed my shot whilst another photographer looked on. We had a lovely chat, he was on holiday and had a couple of days in the Peak District, maybe this blog might have proven useful to him if I’d written it earlier! As I walked back across the bridge towards the car, I glanced back and saw him setting up in the exact spot I’d just been. And why not, it’s a decent shot…..I’ve often found it funny how in some circles of landscape photography, there’s a belief that shot locations or compositions belong to the photographer. They don’t. Daffodils will bloom in that spot long after I’m gone, they belong to the land, not me.
Half an hour spent in Ashford in the Water was to be enough for today. It was time to move onto a bigger landscape, a more iconic landscape, for a quick snapshot or two.
2:40pm: Jerichos View (Parking Location - https://maps.app.goo.gl/RfnXUERkQeqeYyfv9)
I’ve called this Jerichos View because of the painting the adorns the roadside at this location, named after Jerichos Farm located on this road. This is the view of Chrome Hill and Parkhouse Hill, otherwise known as the Dragons Back, two of the true peaks within the Peak District. It’s odd to think of them as peaks though from this angle as both ground in a valley seated far below the surrounding hill line, the tops from this view hardly seem prominent.
I’d travelled past this viewpoint several times on my various journeys to Earl Sterndale, a good base spot for a hike over Hitter Hill to photograph Parkhouse and Chrome, or to continue over them. But I’d never actually stopped to admire the view from here. There’s a clearing roadside to park the car on and I jumped out, attached the 70-200mm lens onto the front of my camera and over the course of 5 minutes or so, grabbed a sweeping panoramic, purposely employing a car driving along the road to give a little more story to what might otherwise, with the flat hazy light of the late winter day, have been a mono-coloured bland boring wide vista with no anchoring focal point.

Jerichos View, so named because of the farmhouse that looks over it.
Again, perhaps a poloriser would have been helpful here with the sky and that specular light. Nevertheless a lovely viewpoint of an iconic Peak District landscape. And with that I jumped back in the car, ready for the 30 minute journey to my last location of the day, one which I know well but haven’t been for a little while.
3:20pm: The Roaches (Parking Location - https://maps.app.goo.gl/hRTrPJGc2KVD4166A)
Unlike any of the locations since Padley Gorge, The Roaches would require walking boots and the full kit to come along. Parking at the Hen Cloud end of The Roaches, I first up went to take a shot of the lone tree that sits there. I’ve photographed the tree loads of times before, but today I took a walk down the road to capture it looking in the direction of Macclesfield rather than Leek. I then headed up the footpath onto the top of The Roaches, heading to Doxy Pool for a shot I had in mind there.

The lone tree which sits at the base of The Roaches

The walk up onto The Roaches. Thankfully there are several steps carved into the crags
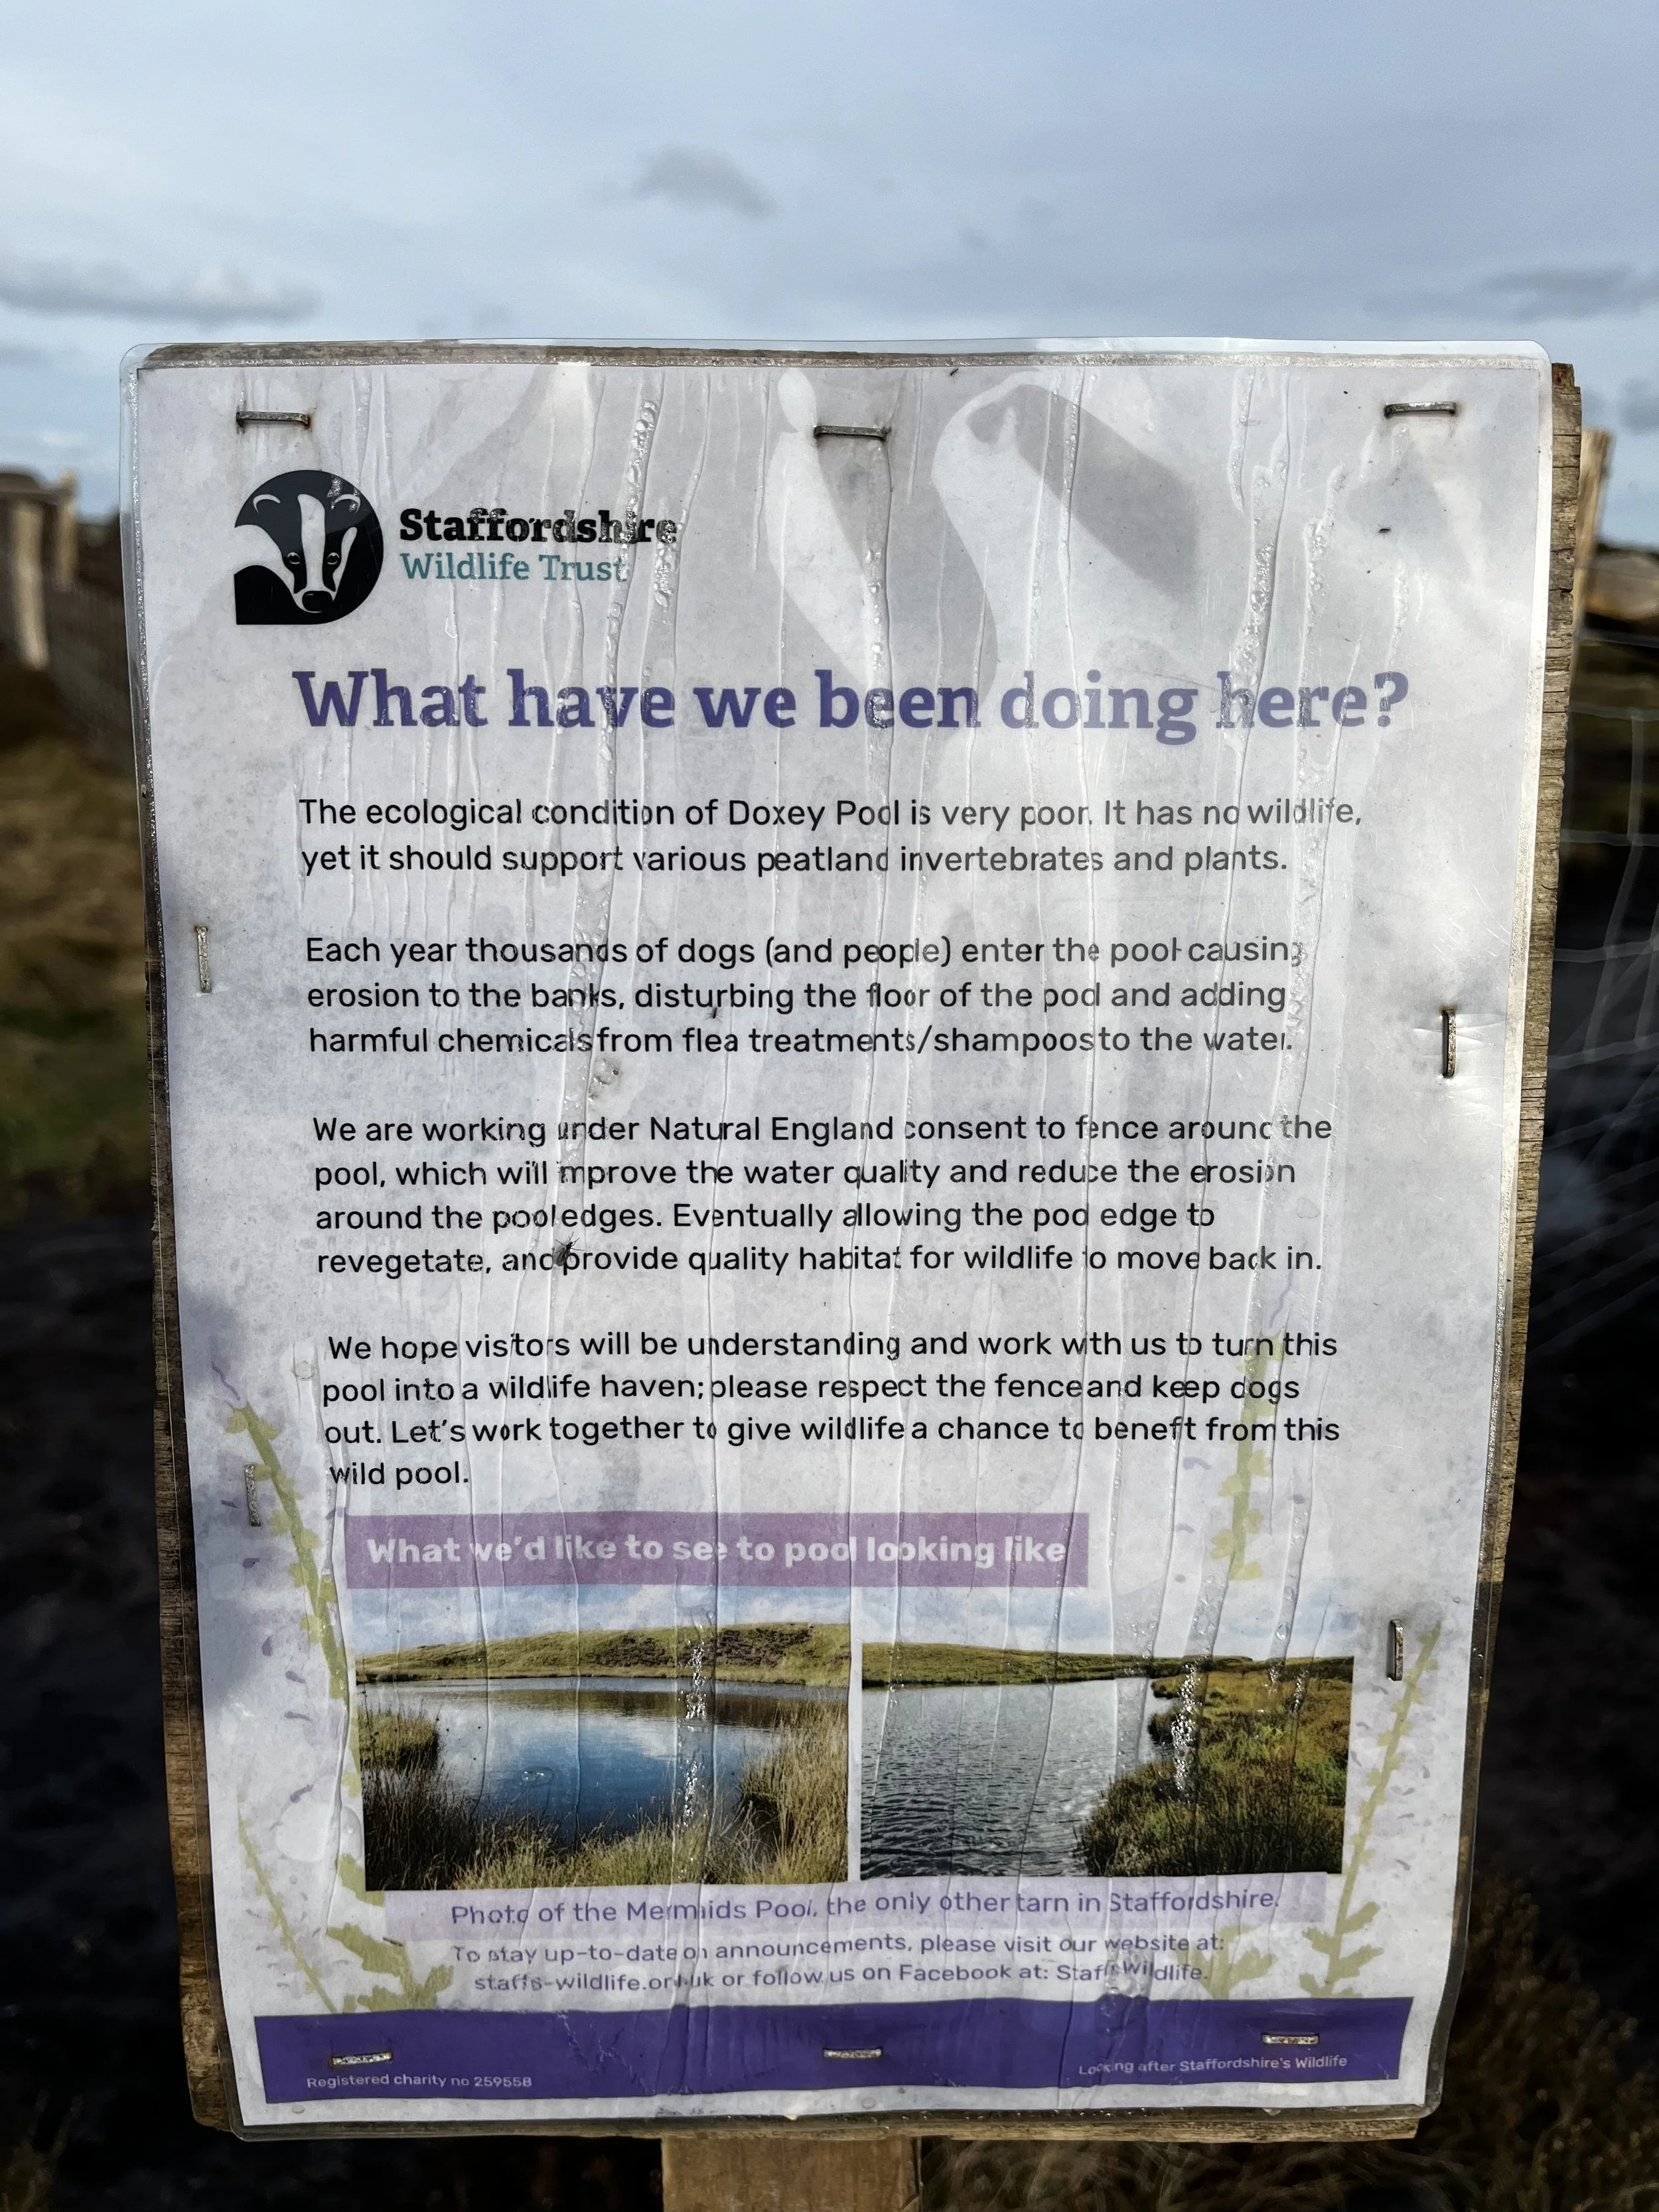
To my upmost surprise though, as I arrived on top at Doxy Pool, I found it fenced off and inaccessible. Even the shot I had in mind, which didn’t require me to get close to the pool would be impossible due to the intrusive fencing that surrounded the area.
Upon reading the signage I completely understood the need to do this. The banks of the pool had been eroded by people and pets over the years and it had been cordoned off to allow nature to rehabit the water and the banks to reform. Absolutely right too, but it doesn’t bode well for photographers for the next couple of years.
Closed
A shot I’ve taken before, so I just used my iPhone to create this image
As I headed back along the higher shelf, I stopped for a quick look out over Tittesworth Resrvoir, having a shot from there already, I just created another quick image of a lovely scene using my iPhone before taking the route along the back of the Roaches to grab a shot from high of the ‘haunted’ barn.

The ‘Haunted’ Barn on the back of The Roaches
Clambering down into the forest, I had a quick check to see if sunset was looking promising, it wasn’t so I walked down by the base of Hen Cloud back to roadside.
I arrived back at the car just as the light was dipping at 5.50pm quite pleased with my days excursion. Hitting six landscape photography locations in one day is no small feat and was only possible because, by now, I know the areas so well. And that’s why I thought I’d share the day and the locations with you.
I kept my time at each location quite tight, but this is still late winter with just about 10.5 hours of light. As we head further into Spring and Summer, even early to mid-Autumn, you’d be able to spend longer at each place, having a good explore. Or even throw in another quick location or two (Blake Mere - The Mermaid Pool - is a roadside location easy to navigate to between Jerichos View and The Roaches).
If you have one day in the Peak District on a photography centric excursion, then this is just one itinerary that you could choose to follow. I warn you, it was a bit tough on the old legs at times, my phone clocked me at a little over 25k steps that day, I felt it the next day (and the day after!). But it was worth it, and I even got a brand new location at Ashford-in-the-Water in the bag too.
Overall a really great day of landscape photography in the Peak District National Park.
Dave Laffan
March 2024

Peak District Desktop Wallpaper Collection - FULL HD PACK
Bring the breathtaking beauty of the Peak District National Park to your digital world with this exclusive collection of 15 desktop wallpapers. Carefully curated, each of the 15 images capture the beauty of the Peak District, showcasing its rolling hills, rugged landscape, and picturesque woodlands in stunning detail.
Featuring 15 Desktop Wallpapers from:
Bolehill Quarry, The Roaches, Mam Tor, Derwent Valley, Higger Tor, Curbar Edge and more
High-Quality Resolution:
Each wallpaper in this 15 image collection is professionally photographed and optimized for high-quality display on a variety of desktop and laptop screens in a 16x9 aspect ratio. This pack is sized for Full HD 1920x1080 monitors (for 4k monitors, please see the available 4k pack).
Embrace the natural splendour of the Peak District:
Elevate your digital environment with these stunning landscapes and woodlands from the Peak District UK. Whether you're a nature enthusiast, a photography aficionado, or simply appreciate the allure of captivating landscapes, this desktop wallpaper collection offers a window into the timeless charm of one of England's most cherished destinations.
Experience this beloved national park, and redefine your desktop aesthetic, with the timeless appeal of the Peak District UK.
Links to products on this site are well researched and usually something I own, use and heartily recommend. As an Amazon Associate, I earn from qualifying purchases made via these links, however this is at no additional cost for you (and we’re talking pennies not pounds!). Any purchase made via these links helps to support the upkeep of this site and the information it provides.
Ads appearing on these pages are not affiliated and are provided by Google. Again, these appear to help support the upkeep of this site and the information it provides.
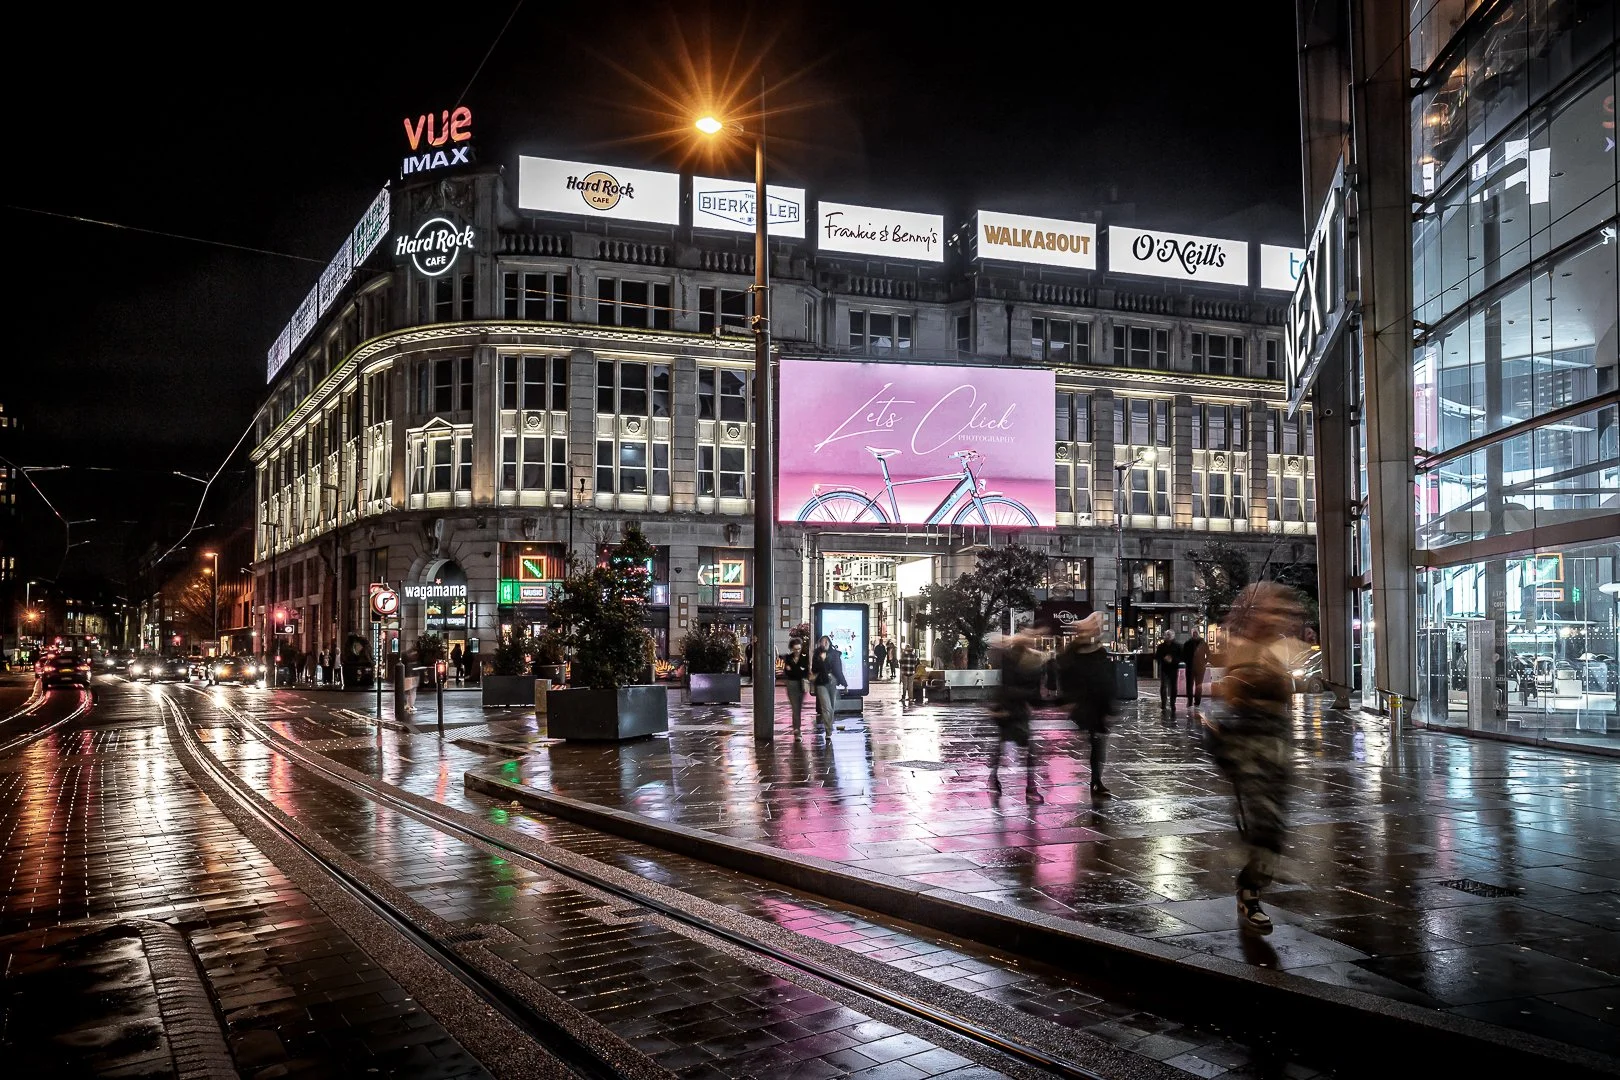
Manchester Photography at Night
Manchester has always been a city of juxtaposition and in these photographs, I wanted to capture that juxtaposition. The vast high rise urban homes rising above the tranquil water top dwellings of others. Manchester’s transport isn’t restricted to just roads, trains, or tramways. The famous canals that run through the city centre and throughout Greater Manchester pay homage to the foundations of the city.

I recently embarked on a photography project in the city centre of Manchester. My home town has a bustling city centre known for its music, vibrant culture, nightlife and lively atmosphere. However I wanted to capture a different side of the city.
Having worked in the city centre for much of my twenties, I would often find myself walking through the city at night to catch the last bus or tram of the day.
And, as I’d make my way across town (if you’re a ‘Manc’ you call it town), I’d be taken with the Manchester that few seem to experience. On a Sunday or Monday night, certainly in winter. it can almost seem like a ghost town. It still bustles with mechanical movement from trams, cars and buses, but normally packed streets and squares would just have a few folks making their way through.
So I set off to photograph this Manchester, the Manchester of quieter nights, where there may be fewer people, but there is still a lot of Manchester life to capture

A tram pulls out of an almost empty Deansgate-Castlefield
I started this mini photography project around Manchesters Deansgate-Castlefield. Starting at the Metrolink (tram) station usually crowded with commuters, it felt earily quiet on this Monday evening. At one point there were four trams in the station with all four mostly empty.
The bars under the tram station that would be packed at the weekend were ominously quiet. The bars and clubs were either closed up or open but hollow. The desolate walkways across the canal seeing no footfall this evening.
I set up my Canon 6d mark ii on a tripod. Aiming to capture some of the movement of transport by exposing for longer than hand holding my camera would allow, I also wanted to create ‘stars’ in the night time street lights. A narrow aperture would be necessary to produce this effect. Composing at 24mm meant dialing f/8 into my camera would provide a narrow enough aperture to do this, the 9 blades within Canon’s EF 24-70 L ii lens providing some great diffraction spikes.
All of the images on this page were created at either f/8 or f/11 within a focal range of 24-30mm.
Perhaps on this first night I could have done with a lens cloth though. A smudge on the front of the lens provided a '‘sputnik’ look in a couple of the lights….greasy remnants from a restaurant shoot I had done earlier that day (although I actually quite like them).

Deansgate Locks, normally a hub of people, tonight deserted.
On my second photography venture into Manchester, the following Monday, I ventured towards the world of the night owls. The Printworks and The Village can usually be relied upon to be bursting with people. But on a wet Monday in winter there were far less people than would usually be found at these locations, just a handful of late night revellers and cinema goers.
As with the previous shoot day, I worked on a tripod. I wanted the images I created to capture the motion of swagger. Allowing the cameras shutter to remain open for 0.3 seconds was just the right amount of time to capture the form of the people whilst removing their detail becoming a blur.
The Printworks can always be relied upon to have a bit of life about it, even on a wet Monday evening in winter
The village, on the opposite side of town, was less busy than I’d expected with half of the many bars and clubs along the street closed for the evening, typical for a Monday night. There were still a few places open towards Princess Road though and that’s where the folks in the image below were heading, under the ‘blanket of stars’ that covered Canal Street. I set up my camera and tripod in the middle of the restricted traffic road to photograph their starry night walk.

There is no chance of capturing this Manchester shot during a sunny spell in summer, Canal Street would be jam packed.
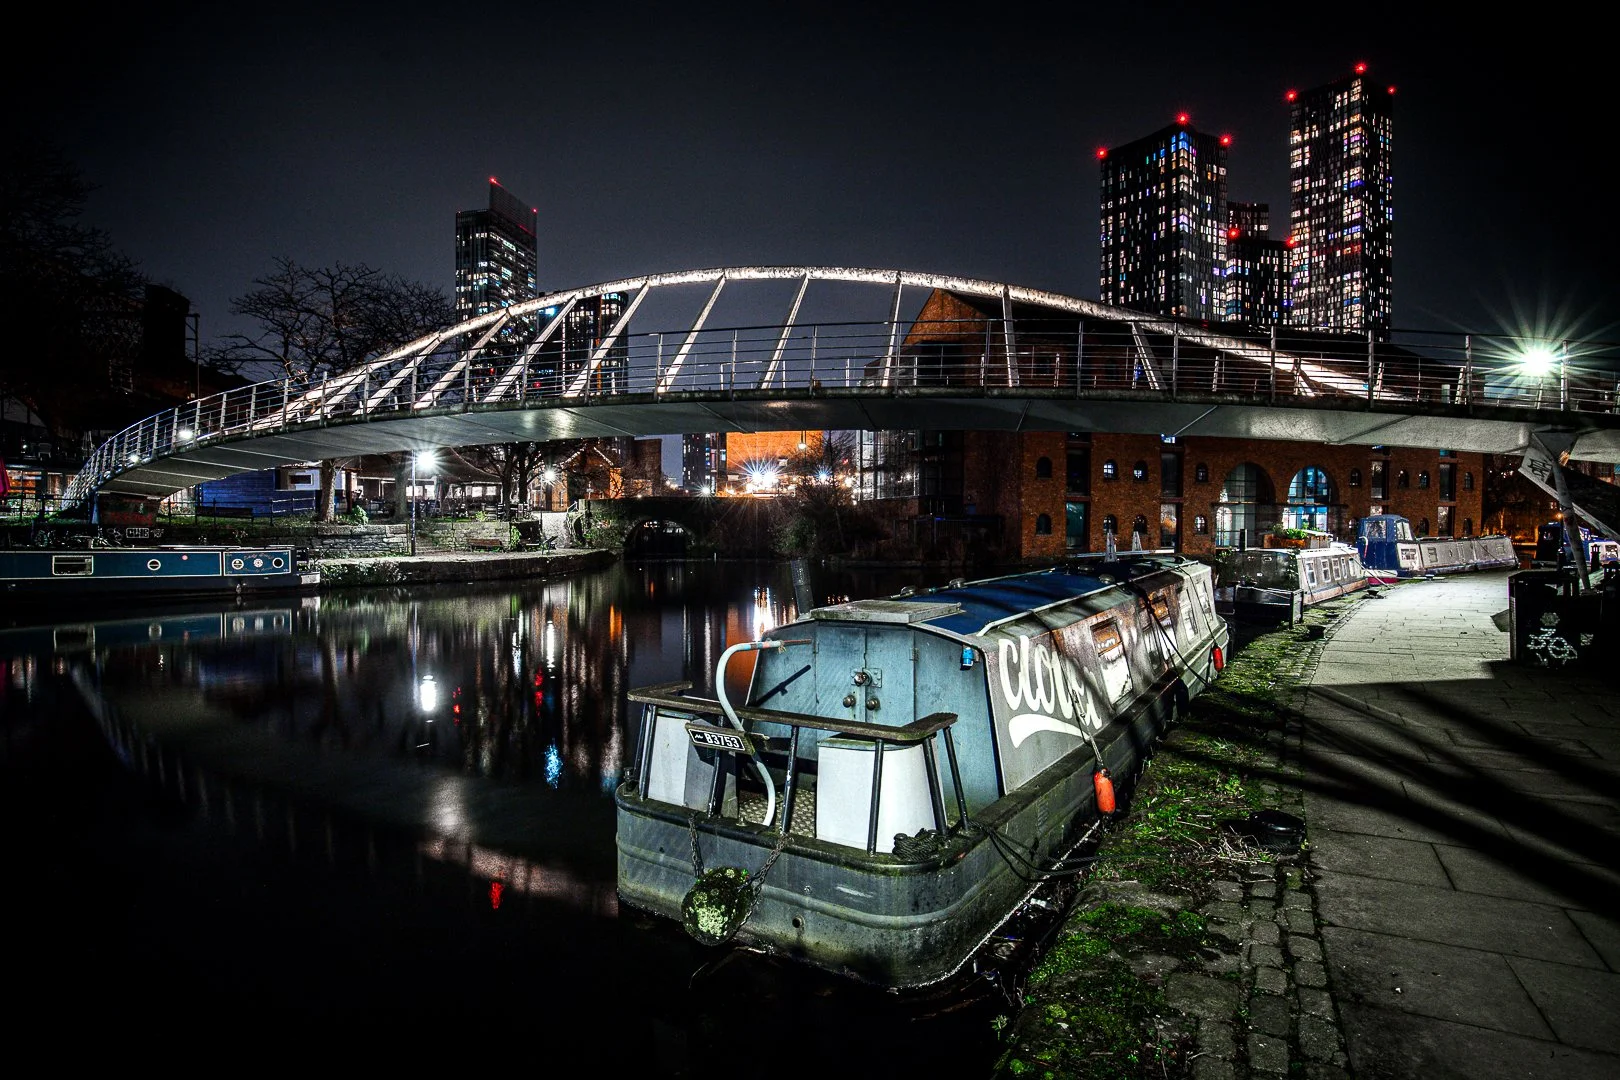
As my Manchester night photography project moved onto its third day, I focused on photographing the transport of Manchester - a symphony of light and life intertwining in a mesmerizing dance.
The Manchester metrolink tram system weaves throughout the city centre and is a great focal point for any Manchester photography project. I chose some classic Manchester locations in front of which to capture the movement of the trams, and capture some of the other transportation bringing people in and out of the city.

If you grew up in North Manchester, you’ll know the thrill of the ‘helter skelter’ Manchester Arndale car park ramp
Many of the photographs I created during these three nights were actually captured in black and white. I’ve given a colour treatment to some of the shots presented here.
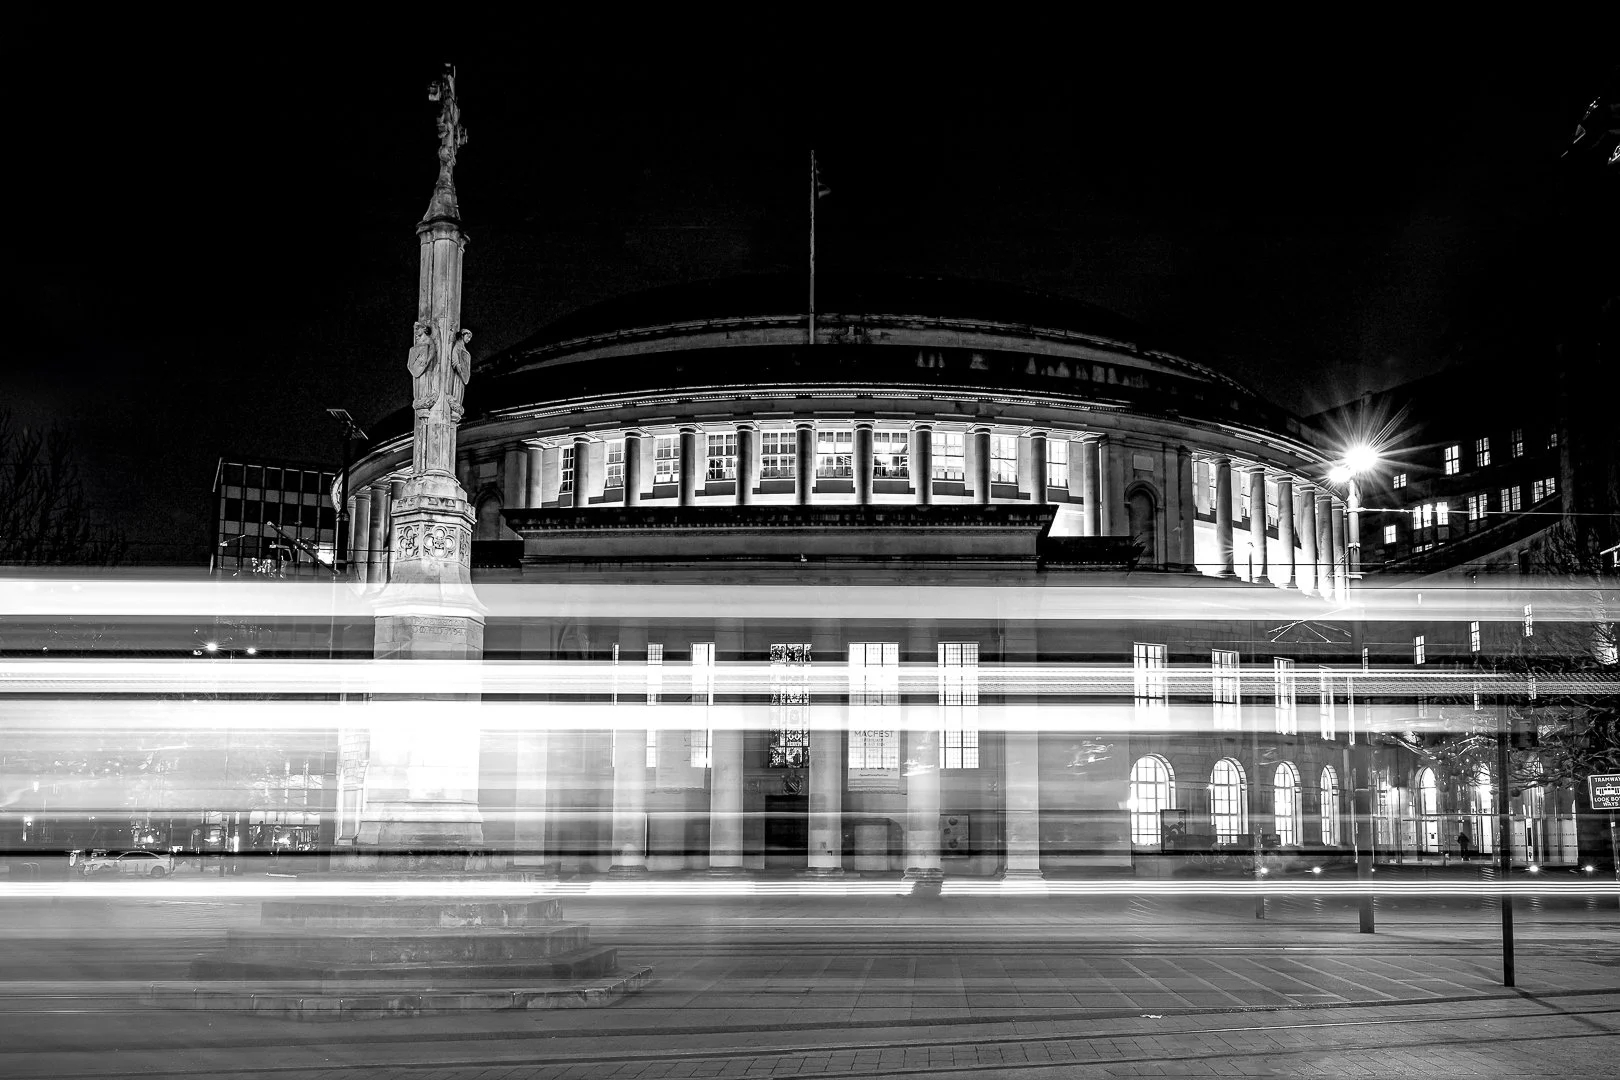
Central Library in St. Peter’s Square

The lesser spotted ‘double’ tram, flying through the city at night with only a few passengers. Rarely seen during peak travel times when needed.
I’m quite at ease photographing in Manchester but once you throw a tripod in the mix, you tend to stick out a little. I like to keep my wits about me when plodding around with camera and lens but a tripod makes it a little harder to be discreet, or to move on quickly if necessary.
And, of course, I generated a bit of attention, goes with the territory. In the main it was a good experience with most people genuinly interested in what I was up to. Whilst cameras are everywhere and there’s a selfie being took on every street corner. A bloke waiting patiently for the right moment, with a large camera and lens atop a bulky tripod, is still somewhat interesting to people….and you’re asking for attention if you set up a camera and tripod smack bang in the middle of Canal Street, on any day!

The Rochdale Canal at Lock 92. Home to the lockkeeper and many others
My last captures are about the people who call the city their home. Manchester has always been a city of juxtaposition and in these photographs, I wanted to capture that juxtaposition of dwellings. The vast high rise apartments which tower above the tranquil water top homes of others.
Manchester’s transport isn’t restricted to just roads, trains, or tramways. The famous canals in the city centre pay homage to the foundations of the city. They paved the way for what was to follow and to this day narrow boats travel through (and under) Manchester providing a city centre home to many. New ways or old ways, it’s how it’s done in Manchester
As I mentioned above, I was quite nerve wracked at times during this project. Cameras aren’t cheap, and that could make targets out of photographers. If you’d like to capture Manchester during the late evening, or during the day for that matter, and would feel more comfortable doing that alongside others, click here to see the latest dates for group tours or workshops in Manchester
Links to products on this site are well researched and usually something I own, use and heartily recommend. As an Amazon Associate, I earn from qualifying purchases made via these links, however this is at no additional cost for you (and we’re talking pennies not pounds!). Any purchase made via these links helps to support the upkeep of this site and the information it provides.
Ads appearing on these pages are not affiliated and are provided by Google. Again, these appear to help support the upkeep of this site and the information it provides.

Photography and The Secrets of Light
Understanding light is crucial for landscape photography because light is photography. It’s fundamental in shaping composition, creating depth and elevating the visual appeal of our images. And learning to observe light, rather than just see light, will place our photographs in a bracket above a large percentage of the masses…..
To really start to elevate our photography we first need to unlock the secrets of light. Light is, without doubt, the most important element of photography, far higher up the pecking order than any piece of camera equipment that we could buy. If our sensor (or film) is nothing more than a blank canvas, then light is the brush waiting to paint that canvas with mood, colour, atmosphere, depth, dimension, and visual magic.
As photographers we are light chaser. And once we begin to think of photography as the harnessing of light, we’ll take our passion for getting out and taking photographs to a whole new level of awe-inspiring visual stories.

Colour, mood, depth and form. All created by the light
Understanding light is crucial for landscape photography because light is photography. It’s fundamental in shaping composition, creating depth and elevating the visual appeal of our images. And learning to observe light, rather than just see light, will place our photographs in a bracket above a large percentage of the masses. Rather than simply seeing, observing will open up so many more options for your photography and potentially change the way you view a composition. Observing is about taking what you see, and attributing significance to it through thought.
Every photographer can see the sunrise, but does every photographer observe it?
Golden hour is a commonly understood time of day. We know that during golden hour (which as an aside rarely lasts an hour!) the sun delivers us a warmer tone of light with elongated shadows. If we observe what happens to the light and the land during golden hour, we’ll notice how that affects several different aspects of our shot, and our camera.
Contrast drops throughout golden hour. The light tends to move across the land much quicker. Colours can change quite rapidly, greens for instance can move from almost yellow to deep dark green within a matter of minutes. Sun flares becomes a nuisance (or a key ingrediant depending on what you’re going for). Dynamic range drops. We get much cooler tones in our shadows whilst the sun is at it’s lowest ‘golden hour’ point than we will when it hangs slightly higher.

Tarn Hows - notice the much darker green tones in the background trees than the foreground due to the difference in light.
These are just a few observations we can make during the short period known as golden hour. And they would all have a potential impact on what you choose to photograph and how you choose to photograph it.
And these changes occur at all times of day and even night. Light is all around us, even when it may not appear to be the case. And it constantly affects the view of the world around us.
That’s why the truely great photographers stand apart. They observe light constantly, making it a lifetime goal, and they make critical compositional decisions based on those observations. It’s through a longer term approach to the observation of light, taking note of the nuances, the different qualities light has, that we can take leaps forward in our photography.

Light painting the land and the sky with colour
As outdoor photographers, we can’t always choose the light we shoot, but by observing rather than seeing, we’ll make decisions about subjects through our understanding of the light, rather than choosing a subject first and being disappointed by the light that is bouncing off it onto our canvas. As photographers, observing, rather than seeing, is the job spec and it’s a powerful skill to have.
Dave

Photographing Low Key Fine Art Photography
I was recently commisioned to photograph some low key fine art images of a sculptured art installation at a local park in Greater Manchester. Each of the set of eight wooden sculptures, dotted around a nature trail, posed it’s own unique challenge due to the location. Some of the sculptures set out in the open, others hidden deep in the woodland or recessed into hedgerow……
I was recently commisioned to photograph some low key fine art images of a sculptured art installation at a local park in Greater Manchester. Each of the set of eight wooden sculptures, dotted around a nature trail, posed it’s own unique challenge due to the location. Some of the sculptures set out in the open, others hidden deep in the woodland or recessed into hedgerow.
The brief was fairly simple and had been discussed in the planning stages with all this in mind. The low key photography look had been suggested by me as a way to fully show the design and texture of the sculptures, without the distracting background of the Greater Manchester park in which the sculptures are installed. This would enable a quicker shoot, with much less equipment needed and help my client meet her budget for the project.
My gear for the shoot was rather on the basic side and consisted of:
Canon EOS 760d - APSC Camera from circa 2016
Canon 18-55mm lens - the non-IS kit lens shipped with Canons starter cameras, which I’ve had for well over a decade
One speedlight (off-camera flash) with wireless trigger
Godox AK-R1 kit - a small kit of easily transportable light modifiers View on Amazon
A magnetic round head flash adapter view on Amazon
Manfrotto travel tripod Updated version on Amazon
The style of photography required the reduction of the ambient light for each composition to zero. That required the following settings dialled into camera manually.
Aperture: f/16
Shutter: 1/160
ISO: 200
Now there’s a chance you may question why, if the aim was the complete reduction of light, would I set my ISO to 200 instead of 100 (the lowest for this camera model)? The answer to that lies in the planning. I know that one of these sculptures sits out in the open with direct light on it, I also know that another one of the sculptures sits in a very tight space where I would have to be fairly close to my subject.


With these two things in mind, I knew that f/16 dialled in for the aperture would achieve the required depth of field, even for the tight shot, whilst retaining the focal length of 55mm throughout. And setting myself at ISO 200 would allow me to reduce the exposure by half (down to ISO 100) when I reached the open field sculpture. All without the need to change any settings which may affect the look of the sculpture in the final image. Consistency amongst all eight images was key.
With my settings dialled into camera, all that was left was to manually expose the speed light. After a couple of test shots, I settled on 1/8 power. I also added my magnetic round head converter and green tint gel to the flash front (from the Godox AK-R1 kit), giving a slightly vintage look to the sculpture and reducing some of the orange and magenta colours in the wood. Lastly I set my white balance manually to 6000k (flash - the Canon 760d does not have a custom white balance mode) in camera and the picture profile to fine detail. Again aiding the consistency and reducing post production work.
And with that I was ready to shoot.
Each sculpture required something slightly different in terms of the light. Some were better lit from one side, some from over the top. As mentioned above, some of the sculptures were recessed into bushes and hedgerow. With these sculptures the challenge was with light spill. This is where my Godox AK-R1 kit came in handy. Having already attached the magnetic holder and green gel to the front of the speedlight unit, I was able to utilise the honeycomb modifier and snoot from the AK-R1 kit for the shots that required it, whilst keeping the green vintage tint in place. This really is a handy little kit for this type of work as the modifiers are stackable and magnetic, so are really simple to modify to achieve different looks.


I paid in full for all my photography gear listed here and the links contained are purely from a personal recommendation standpoint, but if you do want to check out this little box of tricks, then click here to find the Godox AK-R1 kit on Amazon and just to note, unless you have a Godox round head speedlight then you will need this reasonably priced magnetic round head converter to go alongside it Magnetic Round Head Converter
All in, the project including pre-shoot conversations and location scout, post-production and delivery, took a little less than half a day. Happy client, getting some fantastic images and coming in under budget, and happy photographer, delivering a well received commission with very little time and energy consumed. In fact it took me longer to produce the short video I created to document this project than it did to actually deliver the project! You can find that video here: Low Key Fine Art Commission with budget gear
any questions? drop a comment below
Things Click on a Lake District Photography Workshop
How often do we check ourselves? Question what we are doing? Deliberate whether the choices we make, the actions we take and the things we see are the most conjucive to the photograph we want to create? And if we do ask those questions, how truthful or relevent are the answers we give ourselves?
It’s one of the biggest obstacles in photography. And perhaps the most compelling reason to even book onto a one-to-one photography workshop. It’s a stage of learning, and one that many photographers get trapped at.
A few weeks back I was booked for a one-to-one full day photography workshop by Peter who chose to go on my Derwentwater workshop (which I was really excited about for him as it’s chocablock with fantastic locations). In the lead up to his workshop date, Peter and I chatted several times. It’s always fantastic to have those chats between booking and actually getting out there and as we ran through his pre-workshop questionnaire on a call, we uncovered some areas of improvement that he would like to make. He selected some of his photography ‘favourites’ to send over to me so that I could get a feel for his photography. And, with all of this in mind, I devised our route and itinerary for the day. All of my workshops are devised in this way, bespoke to the individual photographer.
Our first stop on the photography workshop. The shoreline of Calfclose Bay on Derwentwater
The morning of the workshop soon came and we met up at our ‘base’ for the day. Peter was admittedly a tad nervous but within five minutes or so this nervousness had turned into excitement. We had hit upon our first location, Calfclose Bay. As the view opened up on a lovely early autumn morning across the lake, I could see that Peter was taken with the view. ‘I can’t believe I’ve never been here before’ he told me. And he was clearly itching to get his camera out, which was just as well considering we were on a photography workshop!
At this point I should offer a word of apology to some of my very first photography workshop clients. Back when Let’s Click Photography started, I would run a photography workshop with a client and jump in feet first. Feeling the need to show that their money had been well invested into the day, I wanted to impart some knowledge straight from the off. Now, I run things a little differently, the benefits of experience.
That first hour is now designated a watching and question brief. Learning what compels the photographer, what attracts them to shoot, what’s their thought process, their workflow? I ask a lot of questions in that first hour, which may seem at odds with the traditional way of teacher-student relationship, but it actually teaches a great deal. Rather than the direct learning I used to try to deliver straight from the off, this is very much an indirect learning moment. And it comes in the form of self awareness.

What is a photographer drawn to? Peter allows some of his street photographer credentials come out.
Self-awareness within photography isn’t something that necessarily comes naturally. Even with experience, how often do we check ourselves? Question what we are doing? Deliberate as to whether the choices we are making, or the actions we are taking are the most conjucive to the photograph we want to create? When we see a shot, what is it we see, how do we break it down? And if we do ask those questions how truthful or relevent are the answers we give ourselves?
Getting to the stage where we have a level of self awareness tends to be one of the biggest obstacles in photography. And perhaps it’s the most compelling reason to book onto a one-to-one photography workshop in the first place. Because, for much of the time, we are oblivious to the obstacle even being there at all. It’s a stage of learning with a rather harsh sounding name:
Unconscious Incompetence!

Peter getting acquainted with a famous location, Ashness Bridge
Simply put, we don’t know what we don’t know. And if you don’t know about something then you won’t know to question it. Unconscious incompetence is something we all have to overcome if we are to move forward in our photography journeys. And there should be no stigma attached to this phase. I’m more than happy to admit that I’m suffering from unconscious incompetence right now. The trouble is that I don’t know what I’m unconsciously incompetent at, because I’m erm….unconscious of my incompetence!
At some point in the future though, I’ll look back on my photography now and think ‘Ah! That was it’. When that happens, it will be the moment when I move from being unconsciously incompetent, to becoming consciously incompetent. Then I can get started on moving myself into the next stage of learning, conscious competence.
There are four stages of learning (the fourth being unconsciously competent), and learning isn’t linear. Which means that we’ll revisit various stages of the stages throughout our photography journey. This is the fun of the craft….we will never reach the finish line.

The jetty’s on Derwentwater are always a great place for a shot or two
But back to those first moments of the photography workshop on the shores of Derwentwater with Peter. Through this first hour or so of me watching and questioning, we uncovered (and I say we because Peter had to uncover it, I just played the part of inquisitor) a part of his workflow that he was getting wrong, leading his images to lack the clarity he craved. Whilst he was aware of this deficiency when it appeared in his final images, he couldn’t pinpoint the cause of the issue, because he was unconscious to it even being something he should consider.
And so we had our first ‘moment’ of the day. These are the bits of a workshop I absolutely love, the breakthrough moments. Moments when you click with somebody, they open themselves up to something and you go on the journey together. In that first couple of hours of his photography workshop, Peter conquered something that he had struggled with for years. He just hadn’t been aware of where the struggle was, instead suffering from frustration each time it had become a visible issue in the final photograph.

Same boat, artistic view. Your perspective changes everything, your view is unique.
And this is why I suggest it to be one of the most compelling reasons to book onto a photography workshop. We can all stand to learn something new. To uncover something we are unconsciousy incompetent at.
Honestly, on the shore of Derwentwater there was an emotional moment. For Peter it was in overcoming this huge hurdle and seeing the other side for the first time. For me, I cannot express the amount of joy I got from him overcoming this barrier. Seeing him freed from this constraint. He had his moment of WOW, his moment of breakthrough. It had clicked, and we hadn’t even reached lunchtime.
There were many more moments to come.
to find out more about my photography group or one-to-one workshops, hit the link below.


Landscape Photography: The Moment Of WOW!
It is far too easy to ruin an otherwise beautiful shot by overthinking it.How do I know this? I’ve done it, loads of times! And quite often, I’ve done it in pursuit of things unnecessary for the shot the landscape has presented.
Yep, I’ve been THAT photographer. You know the one….
It is far too easy to ruin an otherwise beautiful shot by overthinking it.
How do I know this? I’ve done it, loads of times! And quite often, I’ve done it in pursuit of things unnecessary for the shot the landscape has presented.
Yep, I’ve been that photographer. You know the one….attempting to cram every technique I’ve ever learnt into one photograph, making landscape photography a tick box checklist. There’s a reason why I got like that, although perhaps that is one for another blog.
There's so much to consider for any given photograph. But you really do need to be aware that, in doing so, moments can be missed and shots can become convoluted when you start to overthink the shot.
The moment of wow! Tarn Hows, Lake District National Park, UK
Take the photograph above of the trees at Tarn Hows. The light fleetingly kissing the leaves on an otherwise stormy day with thick dark clouds as far as the eye can see. Overthinking really wasn’t an option.
When I first noticed the cloud breaks shining some light on the trees I was up on the Eastern side of the tarn. Up a hill (for those that know Tarn Hows I was by the memorial stone) creating a much wider photograph of Tarn Hows. Scouting the clouds I could see some further breaks heading towards the tarn. The light traversing across the land as if by magic, you know the kind of light you only really experience during a break in a storm, stunningly beautiful.
There was no real way to capture what I envisioned from where I was stood. Looking down at the tree line from up high would have captured a rather flat image of green on dark blue water. It had to be from the Southern shoreline.
Having tried this composition on earlier trips, I knew that this kind of light would work well, as long as it hit the trees. Lighting the subject matter whilst leaving the further shore treeline in shadow.
Grabbing my camera and bag I ran down the hill and around the path. I’m not built for running at the best of times, never mind with a bag and camera in hand but shockingly I made it to the shoreline just before the last break was about to hit the trees and instinct took over.
It was a moment of WOW, and just a moment, nothing more. No time to think, no time to overcomplicate it....Long telephoto lens to pull the background in, 1/200 of a second as I was going to hand hold, f/7.1 at 135mm. I bumped the iso to 200, underexposing by a stop so that when the light hit, it was just focus, click, create. Within two exposures, the light had passed.
I had worked hard to get it….but not with the camera. Yet it wasn’t sheer luck. In order to envision the shot to begin with required all the experience I had photographing Tarn Hows, otherwise I wouldn’t have been aware of the potential from my lofty position much higher above the tarn.
Lots of journeys out in less than suitable conditions had given me an eye for breaks in the cloud, experience had taught me that if there had been one break, there was likely to be others. The instinct borne out of countless times exposing manually, the camera in auto or semi-auto likely to have exposed for the trees in shadow before the light hit (perhaps not, but I’m glad I didn't have to rely on it).
Everything that had come before had led me to be able to capture the shot as it happened….quick! No option but to just do it. And certainly no option for overthinking.
Simplicity.
Sometimes the light and the land present a scene that demands nothing more.
Dave

Landscape Photography: The Endless Pursuit
One of the bad photography habits I've gotten myself into over the last few years is 'whatifid-ism'. Basically the habit of looking back on a photograph, a photograph that I'd once been really happy with, and had loads of great memories of creating, and tearing it apart as I now have new found knowledge or a different way of doing things…….
One of the bad photography habits I've gotten myself into over the last few years is 'whatifid-ism'. Basically the habit of looking back on a photograph, a photograph that I'd once been really happy with, and had loads of great memories of creating, and tearing it apart as I now have new found knowledge or a different way of doing things.
Self-critique is a good thing to do in landscape photography, but it can easily lead into a thought process of 'that's no longer good enough'.
This photograph of one of the waterfalls at Tarn Hows in the Lake District National Park is a great example of this.
At the time, and in the years since, I’ve been really pleased with this photograph. And it would seem that other people enjoy it too, a few prints have been made and sold and it’s garnered social media likes and loves. But there’s no doubt that there are things I could have done differently on location…..some ‘whatifId-isms’:
'What if I'd' tried a wider lens?
'What if I'd' closed down the aperture to get more clarity on the bottom right?
'What if I'd' spent a little longer searching for a slightly different angle?
‘What if I’d’ given over a little more room to the flow on the left?
Asking questions like these, after the emotion of the day and attachment to the shot has passed, is a great way to learn and improve on your photography. Analysing the shot, mulling over the composition, thinking about other ways you could have done it, are all vital tools in the journey of learning that we undertake through our photographic endeavours.
But asking these questions and finding the flaws within an image doesn't make it a bad shot. One of the biggest lessons in photography is that art is rarely ever (if ever!) perfect. Perfection is not something that you can control anyway. Perfection depends on the photographs relationship with the viewer, not with the artist. Post about a photograph that you think reaches perfection on the internet, you’ll soon find someone willing to tell you that perfection it is not!
But it is the strive for perfection (and this is the goal that we will never reach) that keeps many photographers going. But it is an ongoing push and pull between what is in our heads and our final creation.
So, yes, this shot has some flaws. But it is the shot that I created in that moment. A brief fleeting moment that can never be repeated. So,
'what if I'd' not taken it?
‘What if I’d’ missed that speckled light because I was busy swapping lenses or searching for a better angle?
'What if I'd' closed down the aperture and lost texture in the water?
Then it wouldn't be this photograph. And I like this photograph. And if I'd never taken it, then I wouldn't have been able to ask those questions anyway.
Learning is so worthwhile, yearning is not.
Dave, April 23

5 of the best Peak District views for landscape photography
The Peak District has fantastic views throughout its 540+ square miles. It is an area for iconic landscape photography and whilst it would be nigh on impossible to list every single fantastic Peak District view in this one blog post, it is possible to give you my opinion on 5 of the best for landscape photography. And I say ‘best’ Peak District views because these are 5 views of the Peak District that any landscape photographer that is visiting the Peak District would definitely want to take in, and are listed in no particular order.
Will this Peak District view make it into the list?
The Peak District has fantastic views throughout its 540+ square miles. It is an area for iconic landscape photography and whilst it would be nigh on impossible to list every single fantastic Peak District view in this one blog post, it is possible to give you my opinion on 5 of the best for landscape photography. And I say ‘best’ Peak District views because these are 5 views of the Peak District that any landscape photographer that is visiting the Peak District would definitely want to take in, they aren’t the only great views though and they’re listed in no particular order.
Monsal Head

Monsal Dale and the Headstone Viaduct
Monsal Head overlooks Monsal Dale. Located in Derbyshire, it sits in an area of the Peak District known as the white peak. A site of special scientific interest, the area has fantastic views from several vantage points.
Running through the dale is the River Wye and the walks along the river and under the looming Headstone Viaduct are well worth exploring, there’s even a small waterfall to photograph from the banks if you wish.
Of course, it is also well worth taking in the views from on the Headstone Viaduct itself. This imposing viaduct now forms part of the Monsal Trail, which is a traffic free, cycle horse and walking trail. The viaduct itself was built circa 1865 to carry a railway line which linked the cities of Manchester and London.
Monsal Head is easily accessible by car and has visitor facilities including car parks, toilets, guest houses, hotel, pub, cafes and a gift shop…..all this does mean that it can get very busy, especially during the summer season.
The recommended view, as seen in the accompanying photograph, is from Monsal Head overlooking the Monsal Dale with the River Wye and Headstone Viaduct both visible within the landscape. This great Peak District landscape photography view can be found here: MONSAL HEAD - GOOGLE MAPS
2. The Roaches

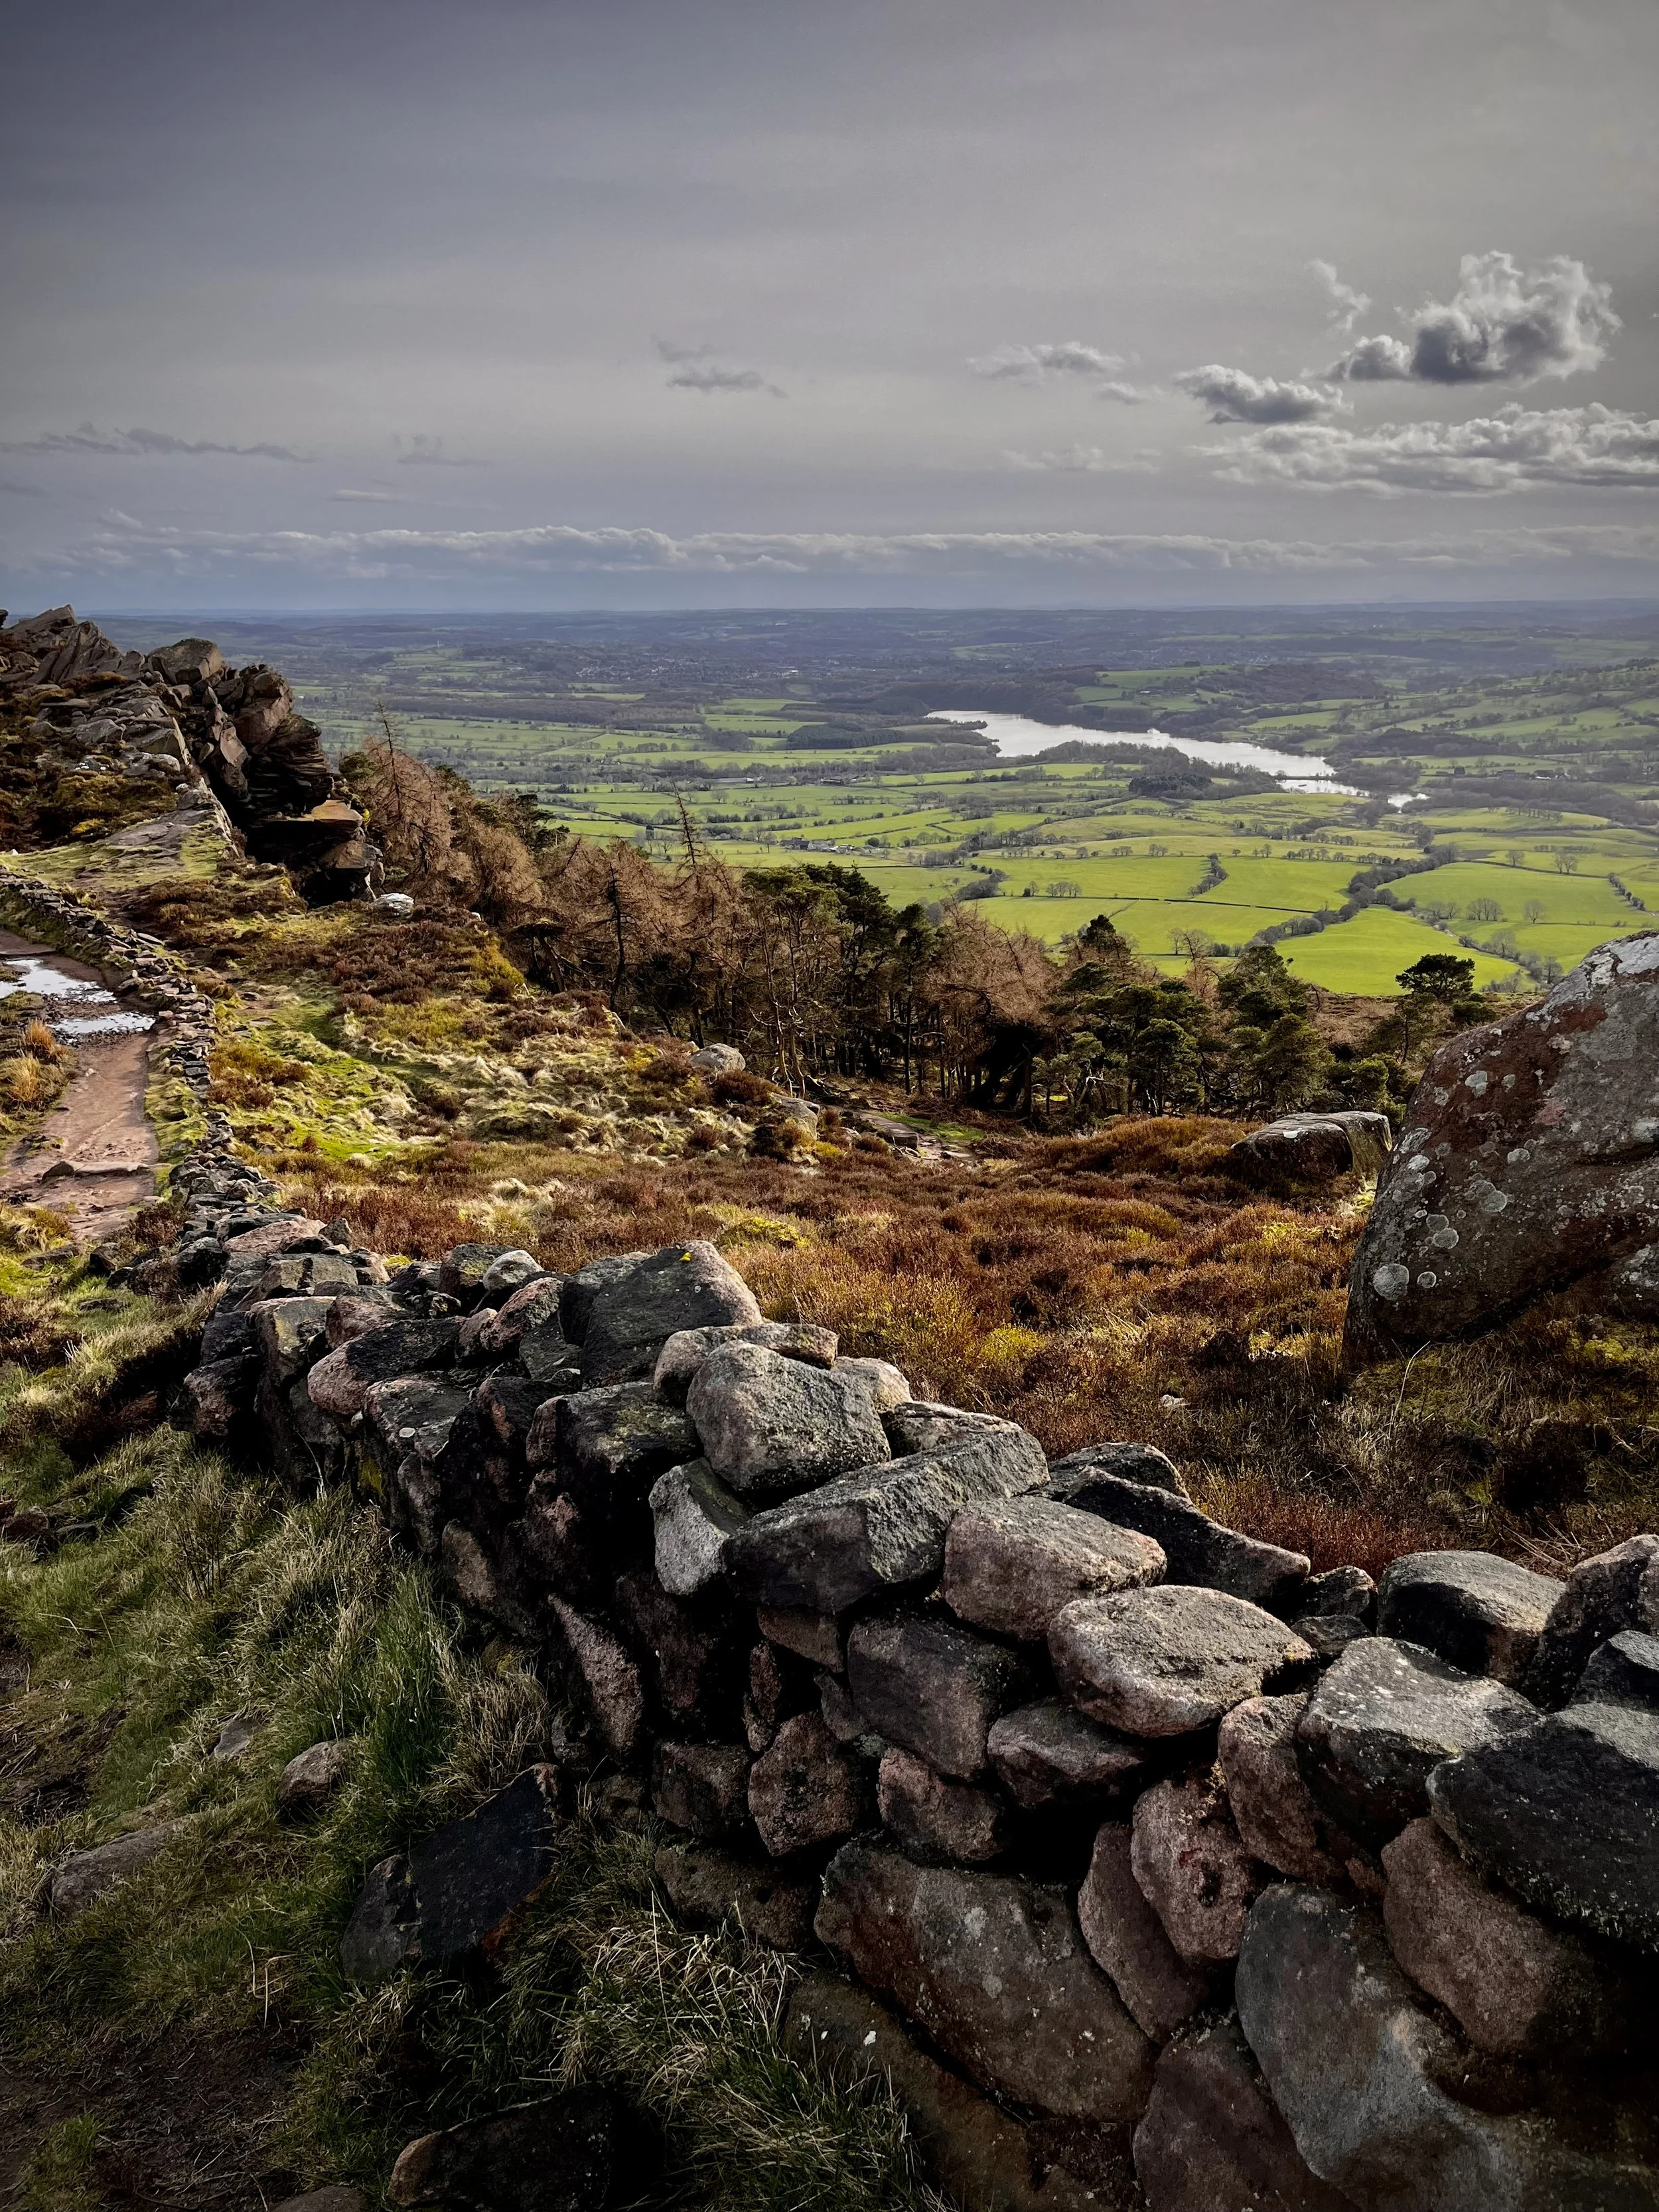
The view from The Roaches, overlooking Hen Cloud and Tittesworth Reservoir
The Roaches takes it’s name from the French Les Roches - The Rocks. Situated in Staffordshire, The Roaches rise 505 metres above sea level. Ironic then that The Roaches were formed under the water. Once a coral reef, the rocks formed over 350 million years ago when sand and grit were compressed over the reef. Now high above the surrounding land, The Roaches offer some of the best Peak District views, especially for landscape photographers.
In clear conditions, it is possible to see over into the county of Cheshire and even as far as Snowdon in Wales from atop The Roaches. Whilst nearby in Staffordshire, you will be able to pick out Jodrell Bank and it’s huge telescope.
The view I’ve picked is from the upper-middle tier of The Roaches looking out over Hen Cloud and Tittesworth Reservoir. It is an iconic view from this part of the Peak District, and deservingly so. There are plenty of other fabulous views to be had from The Roaches but for a pure vista, with foreground, middle ground and background, this one in hard to beat.
The Roaches is easily accessible by car and the best parking for the view can be found here: THE ROACHES - GOOGLE MAPS
3. Higger Tor

A lesser known Peak District view, but Higger Tor is fabulous for photography nevertheless
Higger Tor offers a fabulous Peak District view, perfect for landscape photography. With foreground aplenty, and panoramic views, what’s not to like?! Plus, bonus, it is actually really accessible by car too, only five minutes walk from roadside.
Situated towards the north of the Peak District, Higger Tor is a large gritstone formation which towers above the Iron Age fort of Carl Wark, hence the name Higger Tor, which translates in modern English as Higher Hill.
Despite being easily accessible for most walkers, there are views for miles around. You can take in Hope Valley, Stanage Edge, Burbage Valley and Surprise View from Higger Tor. And to compliment the background, it’s prominent grey gritstone is perfect to frame up some interesting foreground subject matter too.
There is limited parking to access Higger Tor, the location for parking I have given below will only really fit four or five cars at best. There is more ample parking not too far away though at Stanage Edge. This will only add around 10-15 minutes walk, plus Stanage Edge itself is a fantastic place to photograph from too, so why not double up and do both.
The view I’m touting as one of the best is over Carl Warks using the famed ‘Kit-Kat Stones’ as foreground. These can be found towards the South-West of the plateau.
You can find the best place to park for Higger Tor here: HIGGER TOR - GOOGLE MAPS
I do hope this info is useful to you. If you’d like to contribute towards the upkeep of this website and keep it free from advertisements, you can make a donation from as little as £1 by clicking here: DONATE
4. Chrome Hill

The view from Chrome Hill at sunrise is spectacular
It would be difficult to write a blog post about the 5 best views in the Peak District for Landscape Photography without including our last two. So I make no apologies for doing just that!
It could be said of the Peak District that there are actually very few peaks. A visit to to the Dragons Back aka Parkhouse and Chrome Hill in Derbyshire will put that right though. The line of pinnacles that these hills form really does resemble the spine of a stegosaurus dinosaur, although I’m not sure how the resemblance to a dinosaur lands it with the name of a mythical creature, but we digress!
There are a couple of routes that could take you to these hills. The most popular route, and the one I recommend, takes you from the quaint village of Earl Sterndale across Hitter Hill, itself offering a fantastic view of both of the peaks. From there you can either traverse Parkhouse Hill (by far the steeper or the two climbs….and a little treacherous on the way down) or walk along the base of it to find the climb up Chrome Hill. And it is about half way up Chrome Hill that you will find this fantastic Peak District view. An iconic one amongst Landscape Photographers, this view can be captured throughout the seasons, in a variety of ways.
With fantastic views down the Dove Valley, the view from Chrome Hill looking over Parkhouse is a truly spectacular vista that yes, requires some effort and excursion, but offers a great reward for doing so. The walk from Earl Sterndale across Hitter Hill and then up the either or both hills is not simple and will require good quality, sturdy footwear. If you aren’t overly confident in your hiking ability, then not to worry, as I mentioned above, the view from Hitter Hill can be spectacular in itself.
But, this iconic view from Chrome Hill over Parkhouse Hill is truly one to behold if you can.
Parking up in Earl Sterndale and make your way up Hitter Hill behind the Quiet Woman Inn (you’ll see a public access gateway to the right as you walk towards the front of the Inn, go through and turn left to head up the hill), once you are at the top of Hitter Hill over the stile with the warning signs about old mine shafts, turn right to take in the view of Parkhouse and Chrome Hill before heading down the pathway to the roadside and either up or around Parkhouse Hill to get to Chrome Hill. The walk to the base of Parkhouse will take around 20 minutes if you park here: EARL STERNDALE - GOOGLE MAPS
5. The Great Ridge

Without doubt the most popular location in the Peak District National Park. Mam Tor has been nicknamed ‘Blackpool of the Peaks’. This is a reference to the popular seaside town on the North West coast of England (itself nicknamed England’s Las Vegas). And to be fair, it’s a pretty accurate nickname. Go here on a weekend and it will be very busy, no doubt about it. Even during the week, you will often find the car park full of cars. I have never been and not seen other cars already there, and I usually go for sunrise during the week!
The reason, of course, for its popularity, lies within the views. Truly spectacular vistas roll out in front of you as you reach towards the summit of Mam Tor. And whilst the climb up Mam Tor is steep, it is relatively short.
Once you’ve taken in those views from the summit of Mam Tor though, it's time to head down what has become known as the Great Ridge, the pathway between Mam Tor and Back Tor. About half way along this path between the two hills you will find the famed Great Ridge gate. And it’s from here that this view can be best captured.
Whether you use the gate as foreground interest is your call on the day. I have taken the shot from both sides of the gate, using it in the foreground or heading through and taking the shot, as seen above, for the other side of the gate. The pathway and fence make for beautiful leading lines and with the right weather conditions, light up beautiful as the sun rises above the horizon.
You don’t always need clear skies for this view though as you can grab some fantastic moody shots in bad weather…..just make sure you are dressed for the occasion as it can get bitter.
You can find parking with good route signage here: MAM TOR - GOOGLE MAPS
I do hope this was useful and whichever location you decide to visit with your camera, I hope you get some amazing shots.
Don’t forget to join up to the Let’s Click Community for regular updates, special offers and more
Landscape Photography: A Technical Skill?
It may seem strange to think of a photograph being able to elicit powerful human emotions, but this is exactly what a good photograph does. So why do we photographers devote more conversations, more column inches, more videos and more podcasts to the technical side of photography rather than the artistic and emotional side?
Landscape photography is one of the most breathtaking and awe-inspiring types of photography out there. Whether you’re shooting in a vast and seemingly endless mountain range or a small but vibrant forest, the world outside provides a never-ending source of inspiration for us photographers.
But what is it that makes a truly great landscape photo? Is it the technical side? Or is it the artistic side?

A little intrigue can add a lot
The truth is, it’s both. Landscape photography, like most photographic genres, is a unique blend of science and art. On the one hand, you have the technical side of things. The things that get talked about a lot amongst photographers. Aperture, shutter speed, ISO, sensor size, colour science, abberations, defractions and all those other fancy camera settings and gear features that of course, can have an impact on the success or failure of a photograph.
But the technical side only helps to enhance the delivery of the most important element, emotion.
It may seem strange to think of a 2d photograph being able to elicit human emotions, but this is exactly what a good photograph does. It’s where the artistic approach of the photographer steps out of the technical shadow.
Composition, lighting, storytelling, nuance. The capturing of the world in a way that reflects what the photographer is thinking and feeling at that moment. These are the things that trigger emotional reactions within a photograph.
So why do we photographers devote more conversations, more column inches, more videos and more podcasts to the technicals rather than the artistic and emotional side?

Long exposures are a fantastic technical skill to call upon
Having a good understanding of your camera and its settings isn’t essential for capturing a stunning landscape photo. But if you want to do that consistently then it becomes almost completely necessary.
You need to know how to adjust your aperture to control the depth of field, and how your focal length, distance to the subject and sensor size will also affect it.
You’ll need to grasp how your shutter speed dictates movement within the frame. Plus how your focal length and distance to your subject, plus the resolution of your camera sensor can also have an impact on this.
Then you have to mix together all of this to ensure the correct balance of light is hitting your sensor. Probably encountering the last resort, ISO.
This stuff consumes our formative years. All these technicals and more……It takes time to get a handle on and years of practice to truly master.
And the fact is, the reason why they are the primary talking points within photography, and why they consume the years as you start out, is……..
because the technicals can be taught.
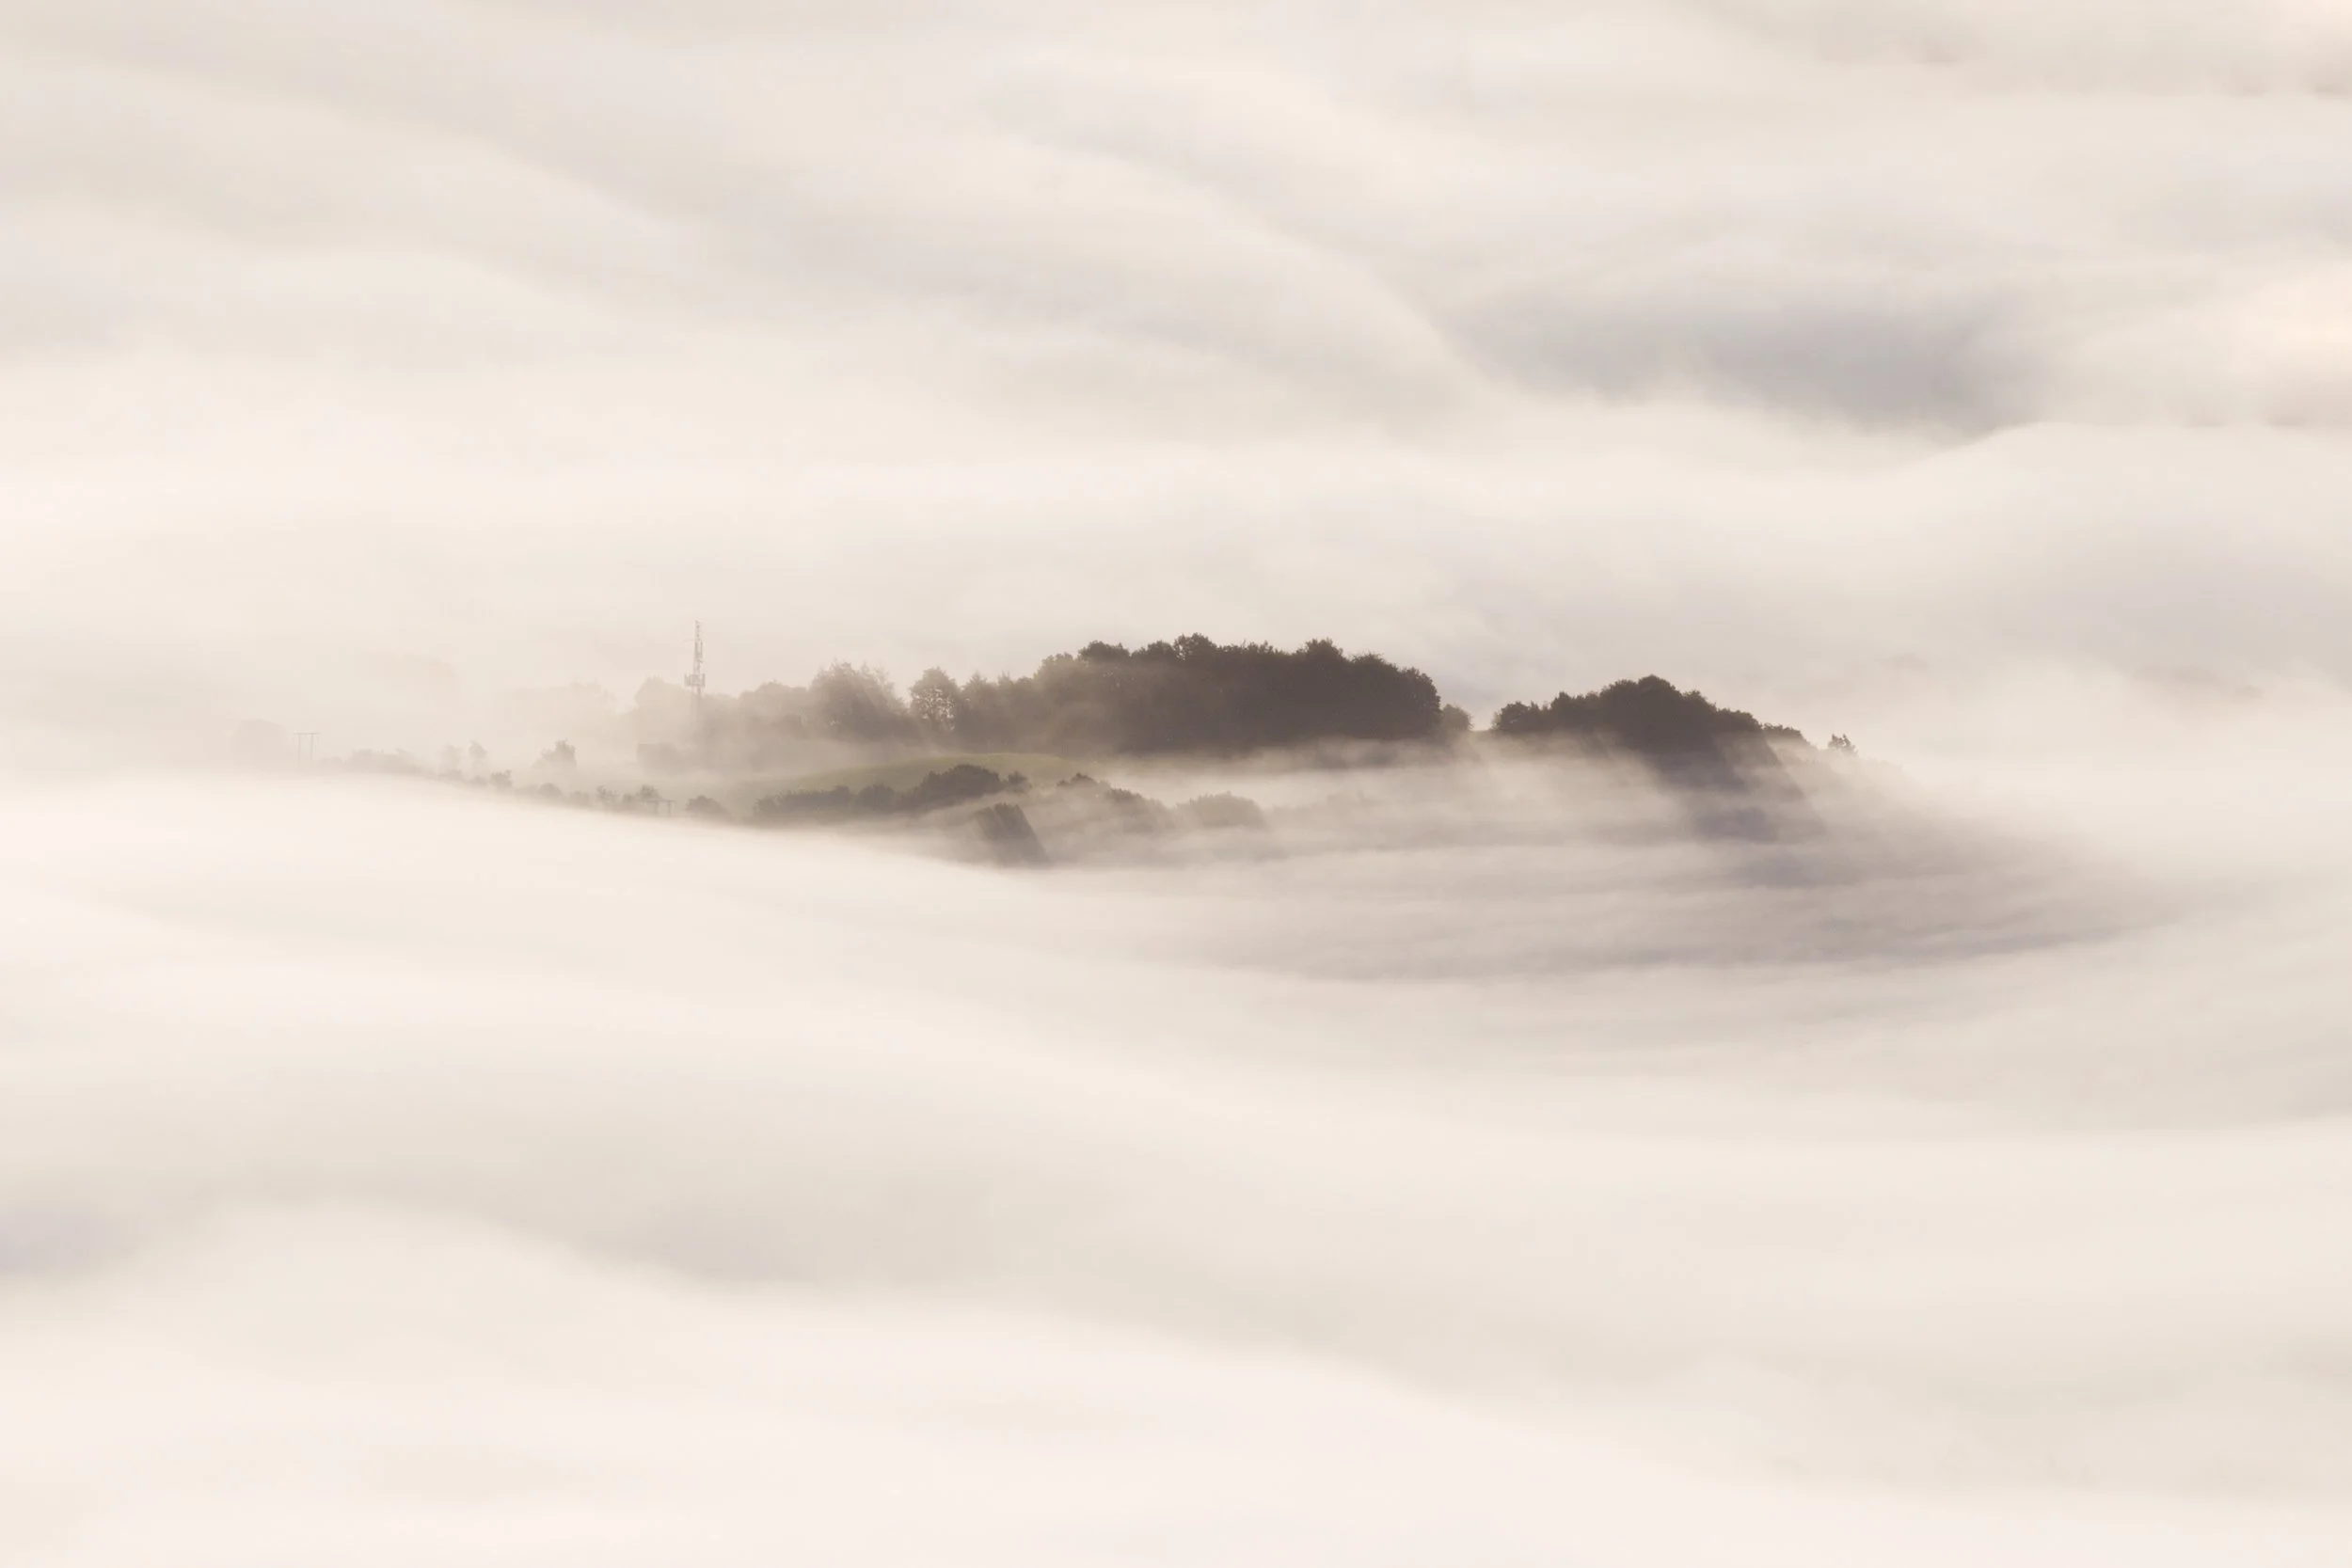
Ansel Adams talked some good sense
Legendary landscape photographer Ansel Adams once said ‘a good photograph is knowing where to stand’!
I’m not going to argue with Ansel Adams! Composition is a key factor when it comes to landscape photography. But is composition a technical or artistic choice?
As part of our technical learnings, we become aware of the rules of composition. These rules dictate a specific place for subject matter and can be incredibly useful guiding principles. And, to be clear, I’m not knocking them at all. You could take a thousand photos using the ‘rule’ of thirds and each one would look unique.
But, I’ve been on shoots with photographers who have tried to force a shot into the rule of thirds. ‘Working the composition’ they call it. Can this be the right approach?
When you find yourself having to work overly hard to fit within a compositional rule, aren’t you forcing composition into the technical?
In my personal experience, more often than not, if you have to work it so hard, the eventual shot is usually a rather uninspiring image.
When we see something in the 3d real world and aim to transfer it to the 2d photography world, we have to think about how we can make that work. We’ve all seen (and taken!) a shot of a landscape that looks beautiful to us in that moment only to find that it looks dreadful on our screens. ‘A picture can’t do it justice’ is the excuse I’ve heard many a time.
But a picture can do it justice. Just not without some thought. Some trial and error. Some effort.
And at those moments, the rules of composition can be so useful. but they are guidelines only. the use of them should never come at the cost of your artistic vision.
Before trying fit a scene into a compositional rule ask yourself what it was that you saw? Why are you compelled to photograph it? Is it purely documentary? Or is there something more than that?
What is the story you want to tell?
Storytelling is such an important artistic aspect of landscape photography. A truly great landscape image tells a story. And it is through the story that we encourage an emotional response.
And it really doesn’t have to be complicated. Perhaps our composition can elicit thought through an intriguing element. Maybe, the light and shade we capture can encourage the viewer to forget their surroundings for a split second and just admire the beauty of a captured sunset.
It's incredibly important to think about what feelings and emotions you want to convey through your photography if it is more than documentary that you want to create (and that’s not to say that documentary photography is without emotion).
So why isn’t this aspect taught alongside the technicals. Why does it not have as much air time as the technicals amongst photographers?
Well, the answer is simple. Capturing that emotion within your shot, the emotion of how you feel, how you want to convey the world through your photography simply can’t be taught. Because the key word is you. You have to make those decisions because those decisions are the extension of you and how you see the world.
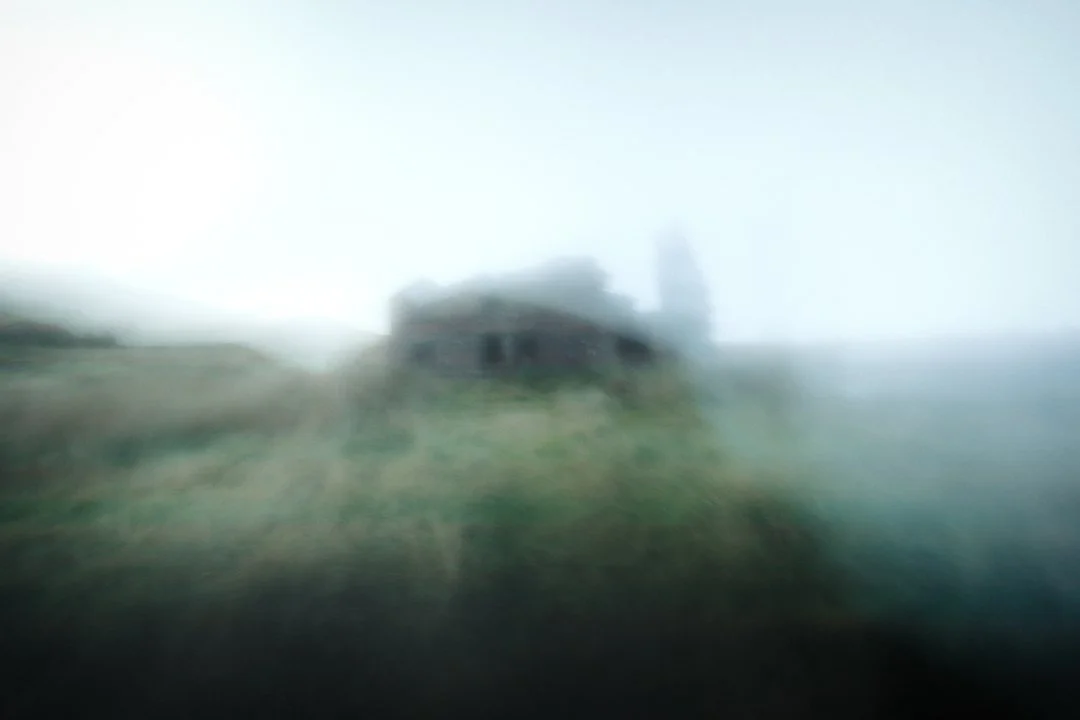
Freed from the constraints of all I have learnt
Landscape photography is a unique blend of science and art. And it is finely balanced.
Photography in or out of the landscape, requires a good understanding of technical camera settings and how your equipment works. But having an eye on composition, lighting, and storytelling is equally, if not more, important.
So as you learn the technicals, don’t get too bogged down in them. Keep in mind that you are mastering the technical side of things to allow yourself freedom from them.
And once you are free from the technicals, you can let your artistic side take over and that’s when the fun really begins!
Dave

Landscape Photography into 2023 and Beyond
….The truth of the matter is that I did far less landscape photography in the second half of the year than the first. There is no doubt that I lost some of my mojo for it. I love the adventure of landscape photography as much as the actual photography itself. Going somewhere I’ve never been before. Exploring and finding a view point that makes me go wow! That’s the part I love, far more so than pressing the shutter on my camera…..
The beautiful view from midway up Chrome Hill in the Peak District National Park - my first shoot of 2022
Hello again, it’s been a few months since I last wrote. I hope that you rounded off 2022 with some amazing landscape photography.
Like I’m sure many of us do, as 2022 drew to a close, I found myself taking a retrospective look at my landscape photography from the previous twelve months.
2022 had got off to a flyer in many respects. My first shoot of the year atop Chrome Hill in the Peak District National Park was a beautiful morning. It was cold but clear other than some lovely haze covering the sun as it rose. This really aided a beautiful winters morning glow over Parkhouse Hill and the River Dove valley.
And then, the following week it was off up to the Lake District to run a one-to-one landscape photography workshop for a client at Tarn Hows (on an aside, I was very chuffed to see that said client has recently been awarded a ‘Highly Merited by the Judges’ award in a landscape photography competition - well done!). The year was well under way for Landscape Photography.

I adore this view, even when you can’t really see through the mist - Tarn Hows in the Lake District National Park
At the start of the year I had made a list of just a few (five in actual fact) locations I wanted to visit in the first half of 2022. There were four in the Lake District and one in the Peak District. By June, I had ticked off all but one. On the completed list were Hallin Fell over Ullswater; Kelly Hall Tarn near Coniston Water; the duo of Derwentwater and Latrigg Fell in Keswick; and Higger Tor in the Peak District were all ticked off. This left me with only Side Pike in the Langdale Valley to go, plus some other locations I had recce’d during the early months of the year. Added to the list for late summer and autumn were Watendlath Tarn; Aira Force Waterfall; a return to Wastwater; and a hike up High Street over Haweswater.
However, having been to the Lake District half a dozen times in the first six months of the year, I only made it to the Lake District once in the second half of the year. Even that was on a very wet day in October when conditions for Landscape Photography were just not in my favour. The day itself had been chosen due to having a morning shoot for a restaurant in Lancashire. Already half way to the Lake District with a free afternoon, despite the weather not looking great, I decided it was time to venture up to Blea Tarn and Side Pike. The conditions had other ideas though. On arrival I found the visibility down to nothing and a very wet mountain climb. Sanity prevailed and I decided that it really wasn’t the day for this landscape photographer.

The view from Hallin Fell looking out over Ullswater towards the snow capped Helvellyn in Spring
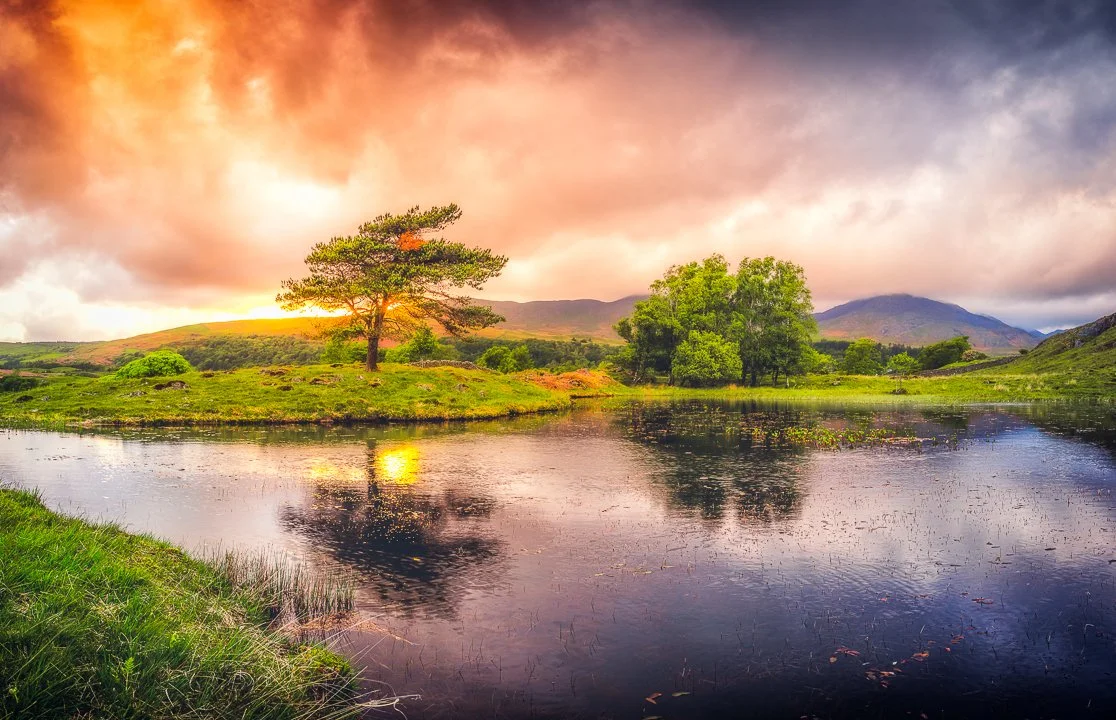
The beautiful Kelly Hall Tarn in the Lake District National Park. I almost missed this shot completely as I didn't think the cloud would break
The main reason for my lack of activity in the Lake District in the second half of the year was very simple. The cost of living crisis in the UK. What had always been a fuel bill of around £22-£25 to do the return trip to Cumbria was now well over £40. And it wasn't just the cost of fuel. Everything had gone up in price. As a professional photographer I was feeling the pinch. Clients began to cut back on shoots and there was no real opportunity for me to up my prices. This meant having to take on more clients (and being able to do that is something I’m very grateful for) and do more work.
The four hour round trip to the Lake District was not only costly in monetary terms, but costly on time, of which I now had less spare. It was an easy decision to make. The second half of the year would see more Landscape Photography for me in The Peak District. Quite simply, from my home in South Manchester, the Peak District is half the travelling time and a third of the distance. A literal saving of time and money vs trips to the Lake District.

The Millennium Stone at Derwentwater which celebrates 100 years of the National Trust. This was one of my spring shoots in the Lake District in 2022
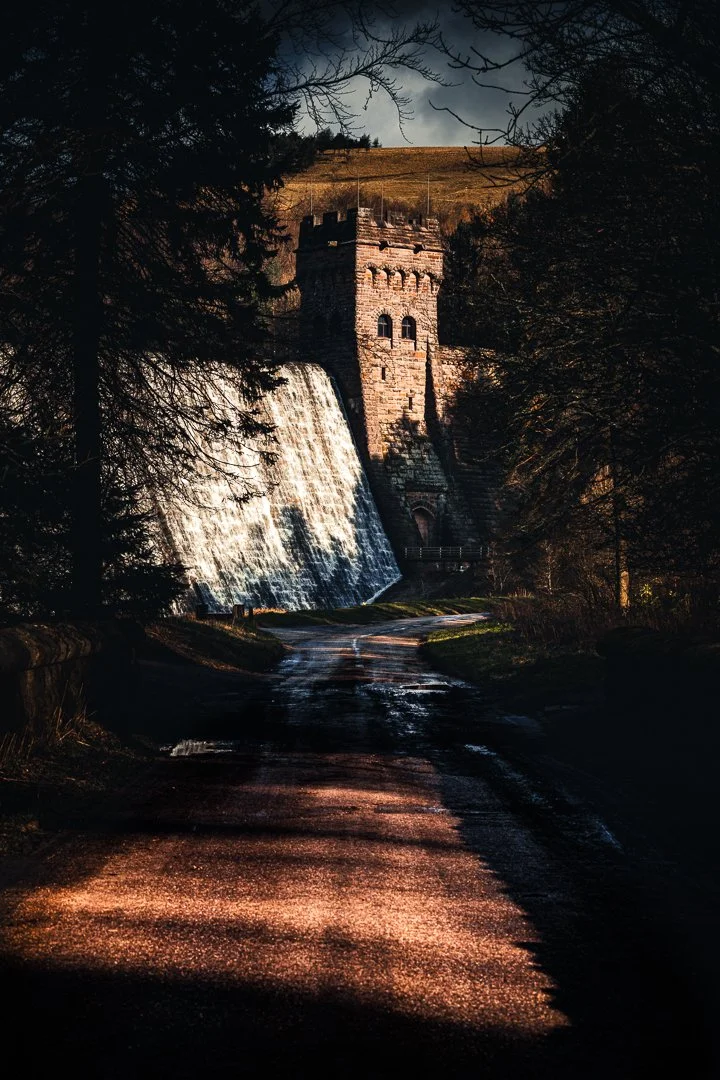
It’s still Derwent, but it’s a Dam site closer! Derwent Dam in the Peak District
Not that the Peak District was ever second choice. The Peak District National Park is awe inspiring for a Landscape Photographer and has absolutely loads to offer in terms of subject matter. I do like my seclusion though and, whilst I love the Peak District, I have always felt a little more ‘away from it all’ in the Lake District. I’ll be back there in 2023 for sure, although I’m getting ahead of myself there.
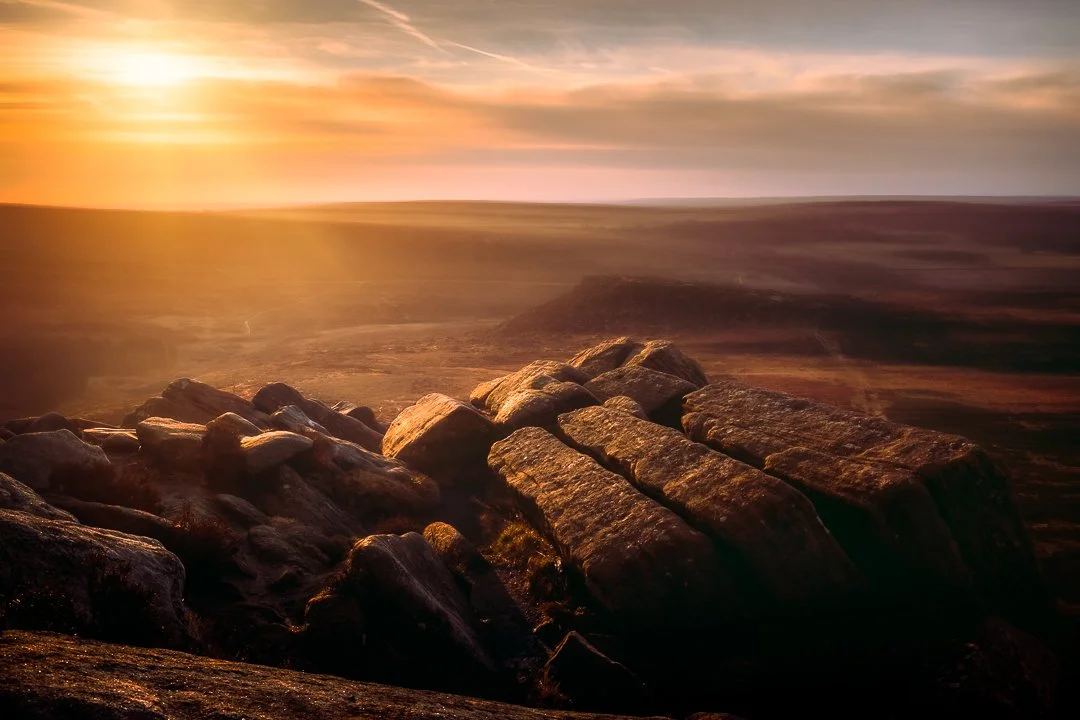
A very windy and cold sunrise on Higger Tor in the Peak District National Park. This formation of rocks overlooking Carl Warks is nicknamed the Kit Kat stones
The truth of the matter is that I did far less landscape photography in the second half of the year than the first. There is no doubt that I lost some of my mojo for it. I love the adventure of landscape photography as much as the actual photography itself. Going somewhere I’ve never been before. Exploring and finding a view point that makes me go wow! That’s the part I love, far more so than pressing the shutter on my camera.
But, with all of the extra workload I was carrying; commercial shoots, family photography, wedding photography, brand shoots etc, it was all beginning to weigh me down. I didn’t feel like I had time to do landscape photography the way I like to. And so each shoot became a time saving exercise. Planned out locations, shots picked before I got there. Working late into the evening the night before and getting up for sunrise, surviving on a few hours sleep. None of it was motivating me to get out. And I wasn’t getting out. Not as much as I had been anyway.

The Roaches in the Peak District National Park. Truly one of my favourite landscape photography locations. I saw it an awful lot though in the second half of 2022
Of course, these are not real problems in the real world. Poor photographer, having to chose one national park over the other. It’s a non-problem. And, with all the above being said, I did have some fabulous moments out and about in the second half of the year. Plus, I ticked off a location, and a shot, that had been a couple of years in the mind. So it wasn’t all that bad, just perhaps not what I had planned in my head as 2022 started. First world problems indeed!
In early Autumn I finally caught a cloud inversion up on Mam Tor over the Hope Valley. Whilst I didn’t actually got any great shots, the experience of seeing it happen first hand was more than fantastic and that in itself was enough. Of course, I created some images, but upon review, they didn't really do justice to the magnificence of the view.
One of my better shots from the morning on Mam Tor. I blame the cloud inversion for being too distracting!
A couple of weeks later and a shot that I had been wanting to take for a long time. I had seen a stretch of woodland way back around the end of 2020/start of 2021 on a walking group. Nothing particularly special. But it had stuck with me and I was determined to go there and try to capture the shot I could imagine.
So, on one of my more motivated mornings. I headed to the location, in a part of the Peak District that I had never been before. A location that isn’t/wasn’t (I had barely seen anything about it until I went, now everybody seems to be going there….coincidence?!?!) too well known and not overly publicised, researching it had been tricky.
Driving up I had that real feel of adventure and was really excited to get out of the car, strap on my pack, stock up on water and start the trek through what I imagined to be overgrown woods, in search of a hidden stretch of woodland path. The reality was a little different. Out of the car, I headed to the little gate at the side of the road, and found it within about two minutes. So no real adventure, but the shot I had in my minds eye for well over a year was finally in front of me. Fantasy Forest.
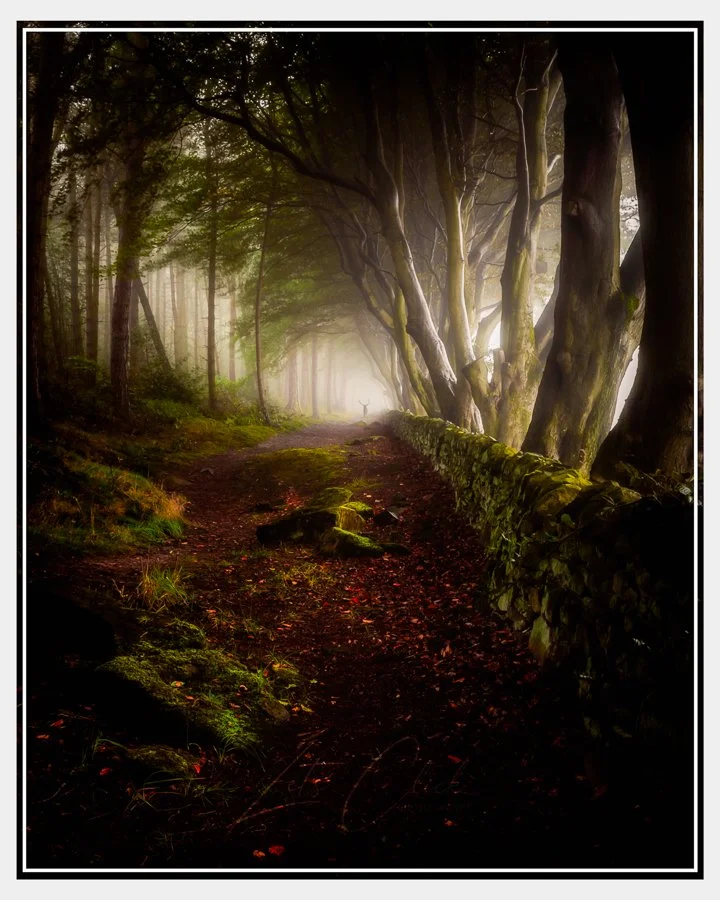
‘Fantasy Forest’. Upper Moor near Matlock
It is through this kind of retrospective view that I start to realise that it wasn’t a bad year for my landscape photography after all. Sure, it wasn't how I thought it was going to be, I definitely missed my monthly adventures in the Lake District. But I am looking now at some of these shots and thinking, yeah, you did alright. And the year wasn’t quite over yet, there were still a couple more shoots to get out and do. And it was about time I revisited a certain North Wales lighthouse.

Talacre Beach is home to the Point of Ayr Lighthouse or simply Talacre Lighthouse. Decommissioned but still looking over the bay.
So what are my plans for 2023. Well it’s my aim to hit the Lake District a few times this year. We’ll see how things pan out with that. But I am approaching the new year with a new vigour. I am excited to start to do some different things. I have been interested for some time in exposure manipulation in camera and spent a lot of time in the later part of 2022 practicing this technique. Finally I managed to create something worth sharing whilst visiting the above lighthouse for a second time in December. It’s a work in progress but I’m really excited by it and think it will form a couple of projects to work on for the coming year. The below images should give you an idea - although neither of them are fully formed yet. Still a lot of work to be done on my technique for both.
An image that was inspired by being uninspired. Location boredom can sometimes produce something a little different. The Barn on The Roaches
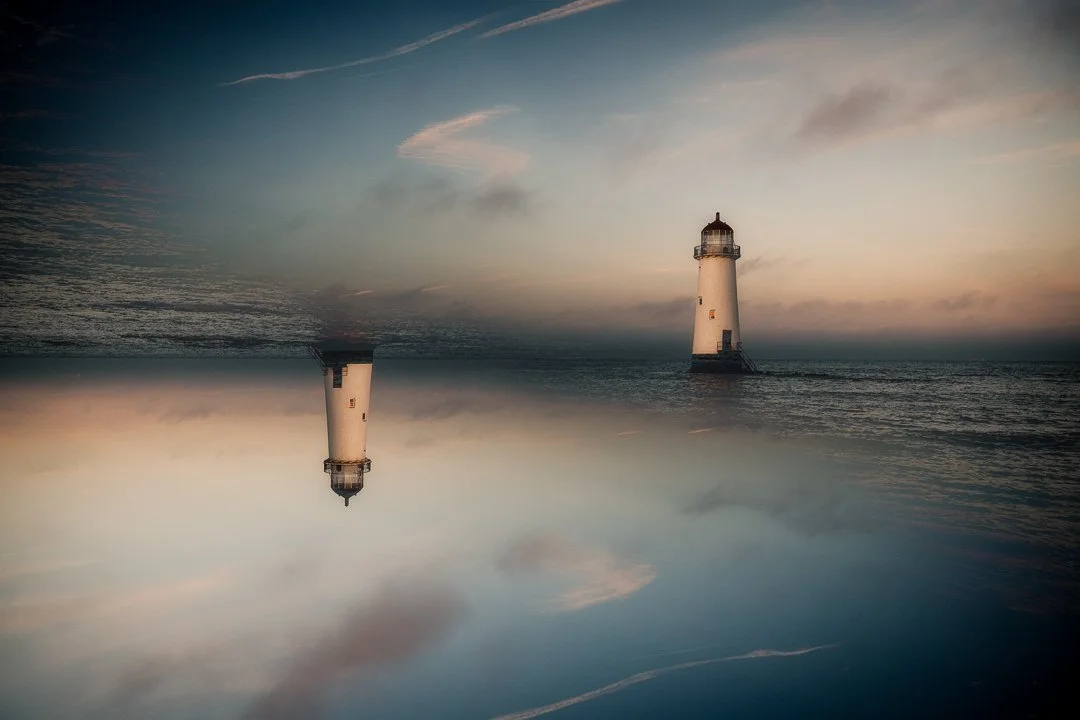
In camera exposure manipulation is a genre of photography I want to explore further in 2023
Plus, I’m becoming really interested in photography at night. Not of the skies above, but of the landscape under the cover of darkness, so I’m hoping to do a few shoots in the landscape under nothing but the light of the moon.
As I review 2022, I hit upon the realisation that I should not be waiting for the landscape to inspire my photography. Rather that I need to be capturing the landscape in a more inspired and unique way. There is beauty where you find it. And, for me, I think I will start to look rather differently at each landscape in 2023. It’s time to let my creative spirit out. To stop being safe with my photography. It is time for my landscape photography to have something to say.
Wishing you a very happy and prosperous New Year - here’s to all the photography adventures we will each experience in 2023.
Dave

Fantasy Forest in the Peak District National Park
….Instantly I was stuck with the location. I could envisage mist, some dappled side light, and the possibility of a shadowy figure heading towards me. I’ve got a lot to thank that photographer for - unfortunately I have no idea of his/her name - as I instantly decided that I had to visit this place and create the shot that I could see in my minds eye…..
Woodland Photography at Upper Moor Woodland | Ashover | Matlock | Peak District National Park

Is that something moving ahead? Heading into the mist at Upper Moor Woodland near Matlock in the Peak District National Park
About a year and a half ago I saw a photograph posted online in a photography group. Taken in a small woodland near Matlock in the Peak District National Park; the image had been taken during the day in late spring/early summer, but even in midday sunlight, still had something mythical about it.
Instantly I was stuck with the location. I could envisage mist, some dappled side light, and the possibility of a shadowy figure heading towards me. I’ve got a lot to thank that photographer for - unfortunately I have no idea of his/her name - as I instantly decided that I had to visit this place and create the shot that I could see in my minds eye.

‘Red’ The barbed wire that adorned the wall at one end of the 'woodland ‘corridor’ proved to be a distraction. This shot taken at a much lower height both to remove as much of the barb as possible and to give focus onto the beautiful moss covering the slab of rock
Fast forward 18 months and I finally ventured over towards Matlock. Coming from Manchester, this is about as long a journey as it gets for me in the Peak District National Park. And, on a dark pre-dawn morning with some light rain and very misty conditions along unlit windy roads, it made for quite the journey!
I had an idea of where to park on the B5057 (you can find it with reference 5FM3+9H7 Matlock on Google Maps | use co-ordinates 53.1834019, -1.5460699 | or search kennels.everybody.shiver on What Three Words) and finally arrived to find the small lay-by empty of cars (something that wouldn’t be the case when I left!).
I got myself ready for the ‘hike’ ahead and with the heavy lump of gear, water, waterproofs, snack bar tripods etc mounted onto my back, I set off on the hike to get on location……..and arrived two minutes later! I really thought I would have to hunt around for the stretch of woodland I wanted but it really was just over the road, through a gate and past a power mast…..easy!
It was still dark so I set off to have a little explore and see what else was luring in the dark misty woods, turned out not much more really. But that one stretch would suit me just fine. The first of many other photographers turned up about 30 minutes after I arrived, and we had a bit of a chat about photography, as you do, before I set about finding the composition that I wanted for the final photograph.

One of the compositions I tried before settling on the final shot, I was trying to find a shot with the wall on the left of the composition…..but it just didn’t feel right for what I envisaged.
I took a couple of test shots at either end of the woodland corridor along which the old wall ran and trees towered over creating an almost circular archway. There were a fair few distractions along the path, part of the wall had fell, barbed wire had been added to sections of the wall to name just a couple and so I found myself back towards my starting point, looking down into the mist.
I had found a section without any parts of the wall tumbling and, with some small rocks on the ground, I had interest along the pathway. Whilst I would have preferred the wall to come into the frame from the left of the composition, it worked just as well on the right side. Everything led to where my ‘fantasy shot’ would have it’s point of interest.
The mist created some interesting challenges as the diffused highlights peaked through the trees. The shadows contrasting to stretch the dynamic range to the full extremes of the histogram. But with composition lined up and exposure challenges overcome, I waited as more photographers were now heading along the pathway (taking a shot or two as they went of course) for several minutes until I had a clear shot then click. the ‘on location’ part of the shot was done. Now a quick trip to the photoshop to finish it off.
‘Fantasy Forest’. Whilst I would absolutely have loved a deer from nearby Chatsworth to come out of the mist in reality, that’s not necessary for a ‘fantasy’ photograph.
All this and it was still only just past 9am. As I headed back to the car, I passed at least 7 other photographers and two more cars pulled onto grass verges along the road as I headed back to the lay-by, which was now full. It’s always nice to finish before the crowds arrive, so a pat on the back for me….and a coffee to celebrate a good mornings work. I finished off the morning with a trip by Magpie Mine and Monsal Head, a while since I had been to either, before the drive back in much easier conditions.
It’s rare that I create composites. But on this occasion I knew from the start that would be the case. Chatsworth Estate is nearby and so it was possible that a random deer may have happened into the woodland although highly unlikely. And that is itself the fantasy part of the shot by definition, so changing a minimal amount of pixels in a photograph was no biggie. Plus, I had the perfect deer shot to do it with - one that I had photographed earlier in the year at Dunham Massey deer sanctuary in Greater Manchester.
And so, after initial processing in Lightroom, I moved the image through into photoshop to add the final touch. An image 18 months in the making was finally finished. Fantasy Forest indeed.
You can see more from Fantasy Forest in the Peak District National Park by clicking the link and watching how I captured the shot over on the Let’s Click Photography YouTube channel: Let’s Click Photography on You Tube

Photographing a Peak District Cloud Inversion
This week I finally managed to photograph a Cloud Inversion. A Landscape Photography aim of mine for quite some time, and I thought I'd share some tips so you could have the best chance of forecasting one for yourself

A beautiful cloud inversion over Castleton and the Hope Valley in the Peak District National Park
This week I finally managed to photograph a Cloud Inversion. A Landscape Photography aim of mine for quite some time, and I thought I'd share some tips so you could have the best chance of forecasting one for yourself
The night prior was a really clear night - moon was clear in the sky and was brisk but not freezing.
Checking the weather app (I used the 'Clear Outside' app) I looked for a few things on there:
1. The Dew Point and Temperature - both need to be the same, or the temperature needs to be lower than the dew point.
2. The wind - a fairly still morning is needed. If it's windy, any mist/clouds will dissipate too quickly to form an inversion.
3. Humidity - this is all to do with moisture in the air, needed to form those clouds, so humidity above 90% is what to look out for.
4. Otherwise clear skies
Strapping on the 70-200mm lens, I could get a unique viewpoint into the clouds
On the morning itself, as I was driving along through the Peak District, I found myself heading in and out of fog banks whenever the road dropped into a dip by fields. A sure sign of the dew point and temperature intermingling. I could also see some mist forming over Black Brook river, pools, lakes and rivers, are sure first indicators as there is lots of moisture in those areas.
Something I've been told to look out for in the past is any smoke that may be rising from factories or chimneys. The smoke will rise normally a certain amount and then seem to stop as if hitting a piece of glass in mid air - a sure sign of a temperature 'inversion'. In the video I recorded on the morning I was up on Mam Tor photographing the cloud inversion in Hope Valley below, I could see the Hope Valley Slate Mine chimneys pumping out smoke and was sure I could see this effect happening there…..anyway another good indicator to look out for.

So if you spot a few of those signs one morning this autumn, there's a good chance of mist and fog......and if you can get yourself above a valley with a camera in time, then you might just get the chance to get above a cloud inversion and photograph this spectacular event for yourself.
You can check out my view over a Peak District cloud inversion here: https://www.youtube.com/watch?v=YfjzsuMPdEg
Dave

Lake District Landscape Photography Locations - My Top 5
Yep, that’s correct. the Lake District National Park only has one official lake; Bassenthwaite Lake. the rest are all tarns, meres or waters by name…..there’s one for your pub quiz bank!
In reality of course, there are many more, with sixteen large bodies of water and seventy six smaller ones that could still typically be classed as a lake.
And so let’s take a look at a few that, as a photographer, you should not miss.
The Lake District National Park here in the UK is famed worldwide for it’s epic vistas and areas of natural beauty alongside, of course, it’s landscape photography offering. And for good reason. It is simply stunning!
England’s largest national park, situated in the county of Cumbria, the Lake District has it all. Breathtaking mountainous landscapes, dramatic coastlines and beautiful waters.
Attracting over 19 million visitors annually (STEAM 2018: Cumbria tourism) it is home to circa 2,000 miles (3,000km) of public access walkways. For its size, it doesn’t house too many people (around 45,000 residents) but it is the natural habitat for an abundance of wildlife and fauna, many being rare species.
There is a lot to love about England’s Lake District.

Beautiful Blea Tarn, not a lake!
But…..there are not many actual lakes to love! Only one in fact. Yep, that’s correct. the Lake District National Park only has one official lake; Bassenthwaite Lake. the rest are all tarns, meres or waters by name…..there’s one for your pub quiz bank!
In reality of course, there are many more, with sixteen large bodies of water and seventy six smaller ones that could still typically be classed as a lake.
And so let’s take a look at a few that, as a photographer, you should not miss. I’ve created this list with accessibility in mind, but some will still require some level of mobility. But I’ve noted where in the descriptions. One thing is for certain, visit any of these spots and fabulous landscape photography will be at your fingertips…..oh and it should be said that these are in no particular order - this isn’t a chart show!
Derwentwater

The famous view from Crows Park, albeit with very high water levels
Derwentwater lies towards the north of the Lake District, just south of the town of Keswick and under the shadow of the Barrowdale Fells and Skiddaw. This is a very accesible area, with fantastic routes around much of the water, offering great opportunity no matter your fitness or ability.

Ashness Bridge itself is rather picturesque too.
There are several parking locations around but I have found parking at the Lakeside car park, adjacent to the theatre, to be a great starting point. This parking location is a pay and display and is privately owned but has lots of spaces. Within a minutes walk of the car park, you’ll find access to Crows Park, from which the header picture was taken, or you can head to the numerous docking points and further along to Friars Crag which is a beautiful location to photograph from. If you fancy a bit of a hike, head up to Ashness Bridge from here and get some spectacular views from over the water. Or, if you don’t quite fancy the walk, you can drive up in 15 minutes or so and there is a National Trust car park (free for members) within a few minutes walk of Surprise View, from where you’ll have a birds eye view of the water below.
A fantastic spot for a days photography.
You can also take a look around this location with me and see these photographs being captured by clicking one of the following links:
Ashness Bridge and Surprise View
Rydal Water

The boathouse at Rydal Water
Rydal Water is located centrally in the Lake District, north of Windermere. Formally known as Routhmere, Rydal Water is a fairly small body of water but has lots to offer. Being a roadside location, it is fairly accessible to reach, but some of the paths are less than smooth and there is the occasional fallen tree to clamber past.

The RAF regularly startle you by flying overhead
Personally I have found parking by St. Mary’s Church to be the best place to start your day’s photography. This is on-road parking and can get very busy, certainly during peak season. A small donation to the church is required and there is an honesty box in place for your coins.
From here you are a short walk from the gateway through to Rydal Water, which is just a short walk along the main road. Or you can take a trip past the church and up to to Rydal Falls, a lovely waterfall which is near Rydal Mount (the once home of Wordsworth).
Not only are the waterside views picturesque, but you can almost be certain that at some point during your visit you will encounter a sonic boom as the RAF fly through the valleys, so have those long lenses prepared for that!
All in all this is a fabulous location and is great for a mornings photography which can be extended to a full day if you fancy capturing both the waters edge compositions and Rydal Mount and Falls.
You can catch me walking around Rydal Water on a misty day by clicking the link:
Rydal Water - Everything Changes
Grasmere

Grasmere - the view from half way up Loughrigg Fell
Grasmere is a beautiful location situated just north of Rydal Water, in fact it feeds into Rydal via the River Rothay. It was from a viewpoint of Grasmere that William Wordsworth once declared ‘the most loveliest spot that man hath found’.
And if it is William Wordsworth connections you are after, then they can be found in abundance in the village of Grasmere situated on the shores of the water.

The mountainous ranges to be photographed from Loughrigg Fell are spectacular
The land surrounding Grasmere is privately owned. And whilst a lot of this is loaned to the National Trust for public access, there are private areas, meaning that you have to venture out onto the roadside pathways to navigate all the way around.
And Grasmere has great significance for the National Trust. The trust was formed as a direct response to ‘The Island’ being privately sold in 1893. Over one hundred years later, The Island finally became National Trust owned.
Photography wise, there are lots of compositions to be had from the shoreline. But if you want the truly spectacular shots, then you’ll be wanting to head up Loughrigg Fell over Grasmere. It is fairly accessible, with the route up to Loughrigg Terrace suitable for most and opening up some spectacular views.
Taking the steps from the Terrace onto the Fell can be hard on your lungs! You need a moderate level of fitness and a good supply of water. But if you can manage it then it is so worth it. The views of mountainous ranges and the viewpoints into the valleys below rank high on this photographers list of amazing locations.
White Moss car park gives good access to Grasmere (and Rydal above too) but is a good 15 minute walk to the shore and it doesn’t come cheap. This is by far the most expensive car park I have had the pleasure of in the Lake District and, if I remember correctly, 6 hours or so was somewhere in the £20 range…..not cheap!
Follow me up Loughrigg Fell and see some more shots here:
Wastwater
I have a particular fondness for Wastwater, not only is it absolutely stunning, was once voted Britains favourite view and seems to have its own mini climate!…but it is also where I got engaged to my now wife, on one knee, along the shoreline.
And so it had to feature in my top five. But all personal affection aside, it is breathtaking. It almost feels like another world. Like you have stumbled across a long lost island. Whenever I have ventured to Wastwater, the air has been still, the silence deafening and the water crystal.

This is the deepest water in the Lake District National Park, and indeed England. It’s surface lies 200ft above sea level, whilst the floor is 50ft below sea level. It is a glacial lake and is reputedly crystal clear at the bottom….Sadly it has cost several divers their lives as they tested out that factoid for themselves.
The water itself is roadside and the views from there are just magnificent from so many differing angles along the shoreline. There are several places to park and several lay-bys along the road too. And of course there are some truly splendid walks and hikes to be had, some of which are extremely difficult and shouldn’t be attempted without the right gear.
The other difficulty with Wastwater is getting there. It is a long drive from the M6 and there are not many amenities along the way so ensure a good supply of fuel and supplies if you are heading there. It is secluded and it is unlikely you will get any phone signal either. But wow, it is truly magnificent. Just grab your tripod and your camera and enjoy.
Tarn Hows
If you have ever watched any of my videos over on You Tube, or regularly visit this site, then you’ll know of my love with Tarn Hows. For me this has everything. Fabulous vistas, great waterfalls, wonderful wildlife, unique woodland and lots of cows!
The memorial stone over Tarn Hows.

Trees unique to this part of the world - imported by a former owner of the estate
But as it offers so much, it attracts many. If you have any plans to photograph here then steer clear of the weekends (or any day during high summer) as it gets so busy and there are lots of people, dogs…..and photographers!
Perhaps only Derwentwater rivals it on this list with the amount of visitors it attracts. Partially, I imagine, due to its links with Beatrix Potter (she of Peter Rabbit fame) who bought the estate here with the profits from her first book. She later bequeathed half of the estate to the National Trust, the rest followed in her will.
And, as it is a National Trust, there is a decent sized car park here (free for members) with good facilities and usually a National Trust member on hand in the car park to offer guides and advice. During summer you can usually find an ice cream van parked up and on occasion other vendors too.

Part of the lower Tom Gill falls
And once you have parked and got yourself ready, there is so much to explore. No matter your fitness levels or ability, you won’t be disappointed. There is a good, well kept walkway around the tarn and plenty of walks venturing off it up into the surrounding fells with views over many mountains in the central Lake District.
And of course the waterfalls. Some splendid waterfalls drop down the Tom Gill hill on the Mary Glen stream, well worth checking out for some great photography. You’ll want your nd filters if you go in the middle of the day.
Tarn Hows is North East of Windermere, about 20 minutes drive from Windermere town and is well worth a visit if you are in the area. You could easily spend a full day exploring and photographing.
And if you want some more information on Tarn Hows (and a couple more tarns in the area too), then click this link to go to my full guide to photography at Tarn Hows - apologies for the audio, it isn’t the best, but worth a watch if you are planning to go:
I hope this article has been of use to you, let me know if you plan on visiting any of these areas via the comments, I’d love to hear from you.
Dave
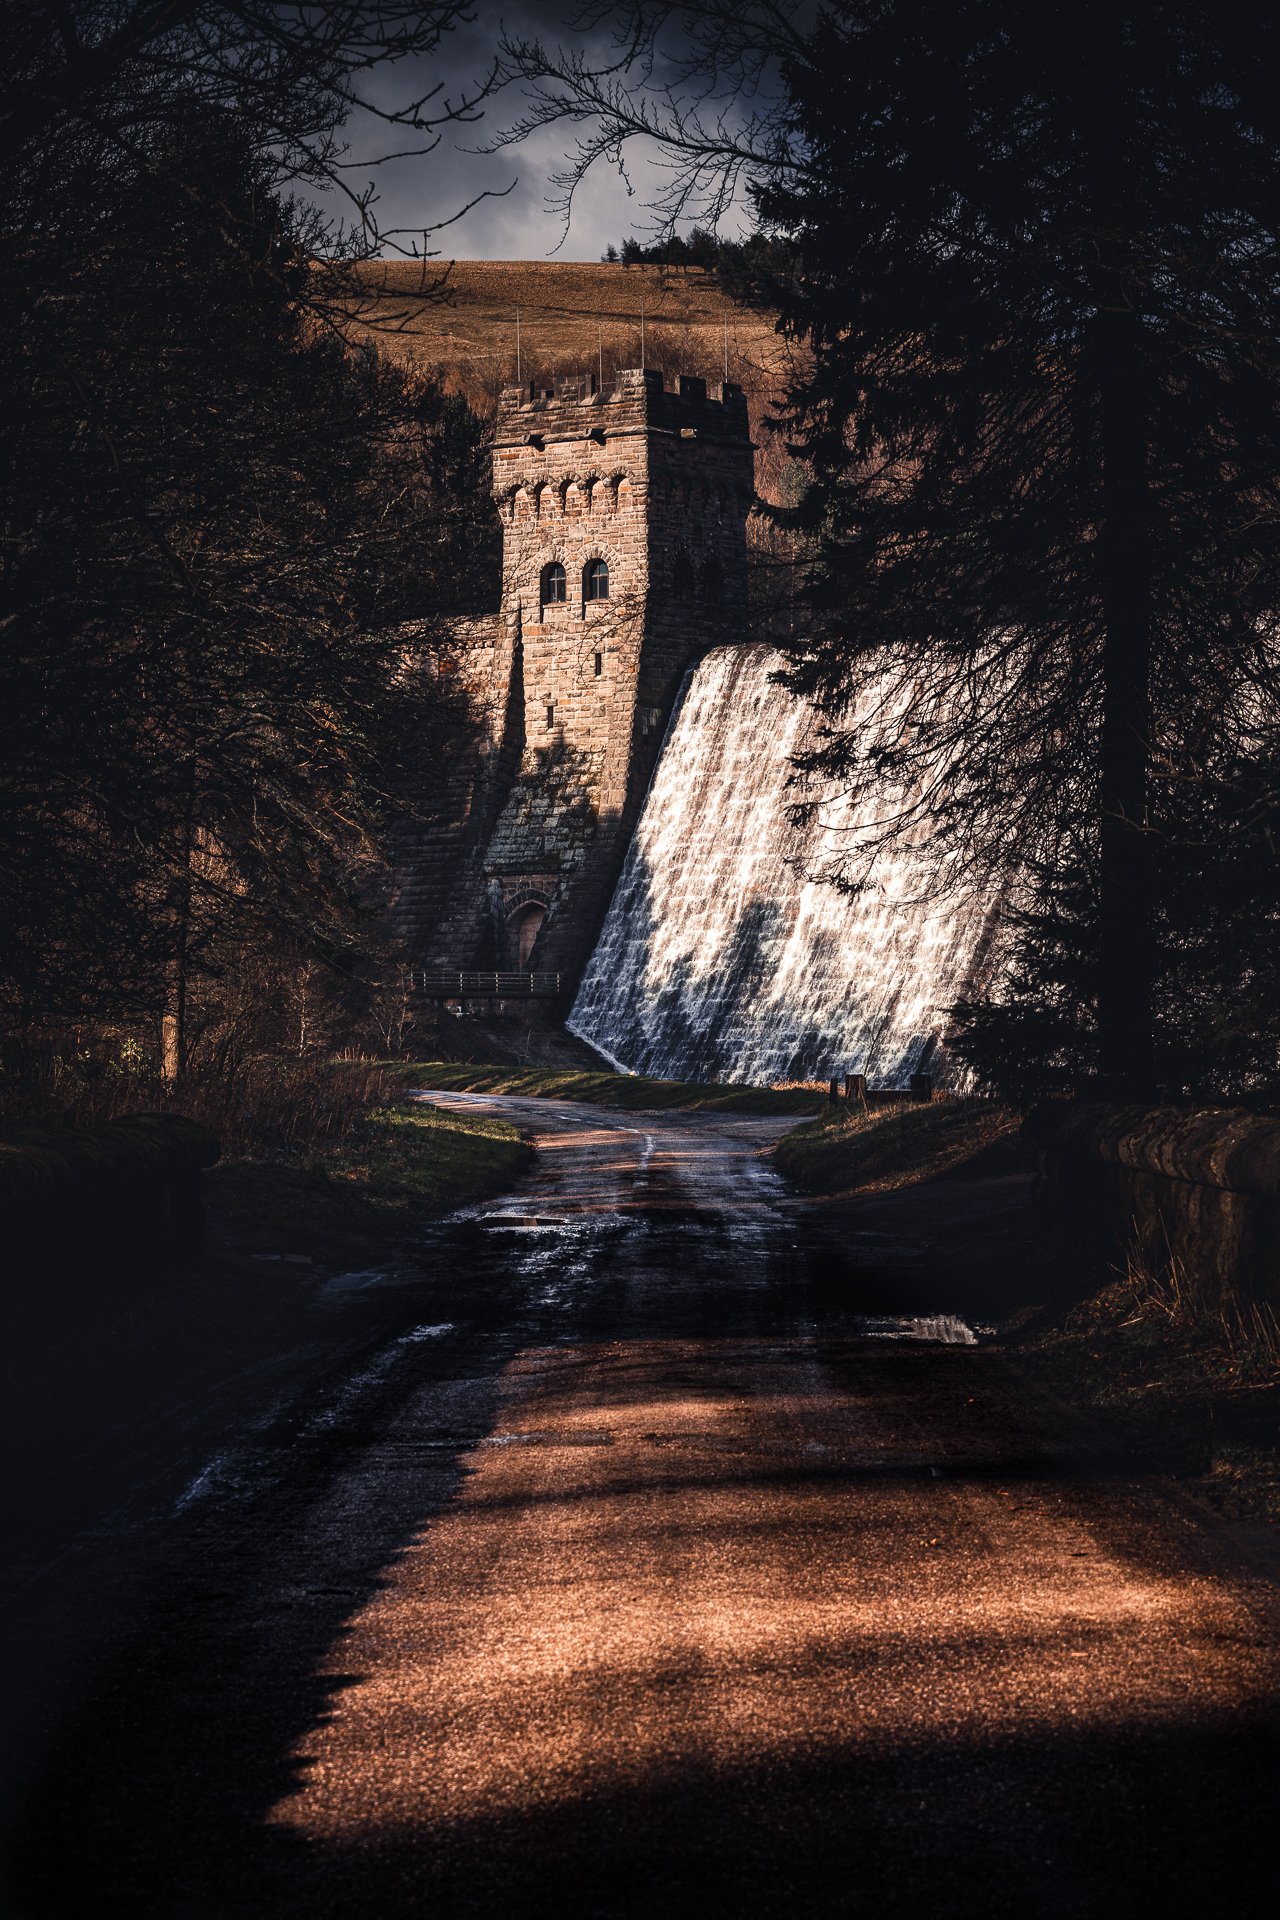
Can I Ask A Stupid Question? Learning Landscape Photography - Be Nice!
‘Can I ask a stupid question’?…….But it rarely is a stupid question.
Something that I’ve come to understand over the last couple of years is that if you don’t know, you don’t know. And that actually makes the question itself really difficult to even ask. Why would you ask how, for example, you would set up a tripod, if you don’t know that you are setting it up incorrectly in the first place?……….
This week, over on my You Tube channel, I’m going to be sharing some of the questions that are asked by my Landscape Photography workshop clients, alongside the answers of course.
And there is one thing that ties all these questions together. Even though they were asked by different people, around different parts of the country……
‘Can I ask a stupid question?’

The video was filmed on location at Derwent Dam.
It struck me back in November that I heard this a lot, and not just on workshops either, but across social media pages and over in the comments section on You Tube. Whenever someone would ask what they had pre-determined to be a basic question, it seemed that this question preceded the actual question.
But it rarely is a stupid question.
Something that I’ve come to understand over the last couple of years is that if you don’t know, you don’t know.
And sometimes that actually makes the question itself really difficult to even ask. Why would you ask how, for example, you would set up a tripod, if you don’t know that you are setting it up incorrectly in the first place?

Some beautiful light hitting the pathway through the trees….Foreground interest doesn’t always need to be an object jutting into your frame.
I’ve had many a student who was setting up their tripod incorrectly, but only one who ever asked me how it should be set up……and that was preceded by ‘can I ask a stupid question….’ Of course, where I do see bad tripod use, we will correct it during the day. But, despite encountering this scenario many times, only once have I ever been asked about it.
And then there are the questions we want to ask but are afraid to appear foolish. But these themselves are always really relevant questions….
‘Why would I use a two second timer?’
‘What do you mean by focal length?’
‘What’s bracketing?’
‘What’s foreground interest?’
‘Why do I get blurry photos at night?’……….
The thing is, none of these questions or any of the other questions I’ve made a note of, are stupid. If you don’t know, you don’t know. But unfortunately other photographers can sometimes have a bit of a smarmy ‘you should know everything’ way about them and that makes it so that people don’t feel comfortable asking.
That was certainly my experience many years ago and I do still see this a lot today. In fact it is probably even more prevalent now, in the days of social media, than it was back in my early stages of learning.

So, over the course of a couple of months, I’m collating these questions and answering them over on You Tube (link is down below). And I think that we should all keep in mind that there aren’t really any stupid questions. If you don’t know, you don’t know. So don’t be afraid to ask. And if you are asked a question, don’t be one of those smarmy know it alls, be nice and answer the question as best you can. We all have had ‘stupid’ questions in our time.
Learning photography is hard. Landscape photography is hard. Be Nice!
Dave
The photographs in this read were taken on location at Derwent Dam in the Peak District National Park during the course of filming the video.

Landscape Photography: Graft For Your Craft
However, despite checking the weather forecast thoroughly the night before, I arrived to find nothing but grey low cloud blocking any light and reducing visibility down to not much. So another bust…..all part of the landscape photography deal here in the UK.
And so to the third visit. We had almost clear skies. There was a bank of cloud low on the horizon, but this would just serve to diffuse some of the light and create haze rather than block the light completely.

The view from Higger Tor across Hope Valley. Mam Tor, The Great Ridge, Win Hill and Lose Hill all visible rising up over Castleton and it’s Slate Mine
This week I’ve been up into the Peak District not once, not twice, but thrice, chasing some landscape photography. Higger Tor was my destination on each of these occasions and 7am was my time of arrival each day.
The first occasion was a recce. I didn't even take my camera gear. I wanted to see how the light fell throughout the morning. Plus, having never been up Higger Tor before, I wanted to see the lay of the land. It is so much easier to have an idea prior to the shoot rather than trying to find a shot on the day. Especially for landscape photography at sunrise!

Another view from Higger Tor, those beautiful hues given by the sun just risen over the hills to the left of shot
The second visit was for the shoot. However, despite checking the weather forecast thoroughly the night before, I arrived to find nothing but grey low cloud blocking any light and reducing visibility down to not much. So another bust…..all part of the landscape photography deal here in the UK.
And so to the third visit. We had almost clear skies. There was a bank of cloud low on the horizon, but this would just serve to diffuse some of the light and create haze rather than block the light completely.
The battle was very much on though because, whilst the light was playing ball, the other elements were not. It was freezing. Literally. The ground was frozen, there were pockets of hail fall, and the wind! Well the wind was hard. Driving wind which was blowing the camera all over the place, and not just the camera….I was taking a beating. It was tough. And in those conditions, really difficult to keep motivated whilst I waited for the sunrise.
If you want to experience just how windy it was then check out the video I will be uploading to You Tube this weekend, just click here - Let's Click Photography
I got the shot I wanted, well close enough considering the conditions, but the day itself had only been half the battle. Each of the days I visited meant a 4.45am alarm call; getting up on that third day was tough. Honestly, I almost didn't. I knew what I was in for and another potential disappointment was not that alluring. The 65 minute drive to location, and even worse the 90-100 minute drive back (there’s not much traffic at 5.45 in the morning, but there’s a heck of a lot by mid morning). The lack of sleep. The hike in the dark. The cost of fuel. The freezing conditions! There was a lot to put me off.
But I have learnt over the years that you have to graft for your craft (a saying I heard recently on a podcast - I’m having that!!) and this is all part of that graft. Even on the days when I don’t get a shot I still feel come back feeling good about it……and then I remember I have to work!
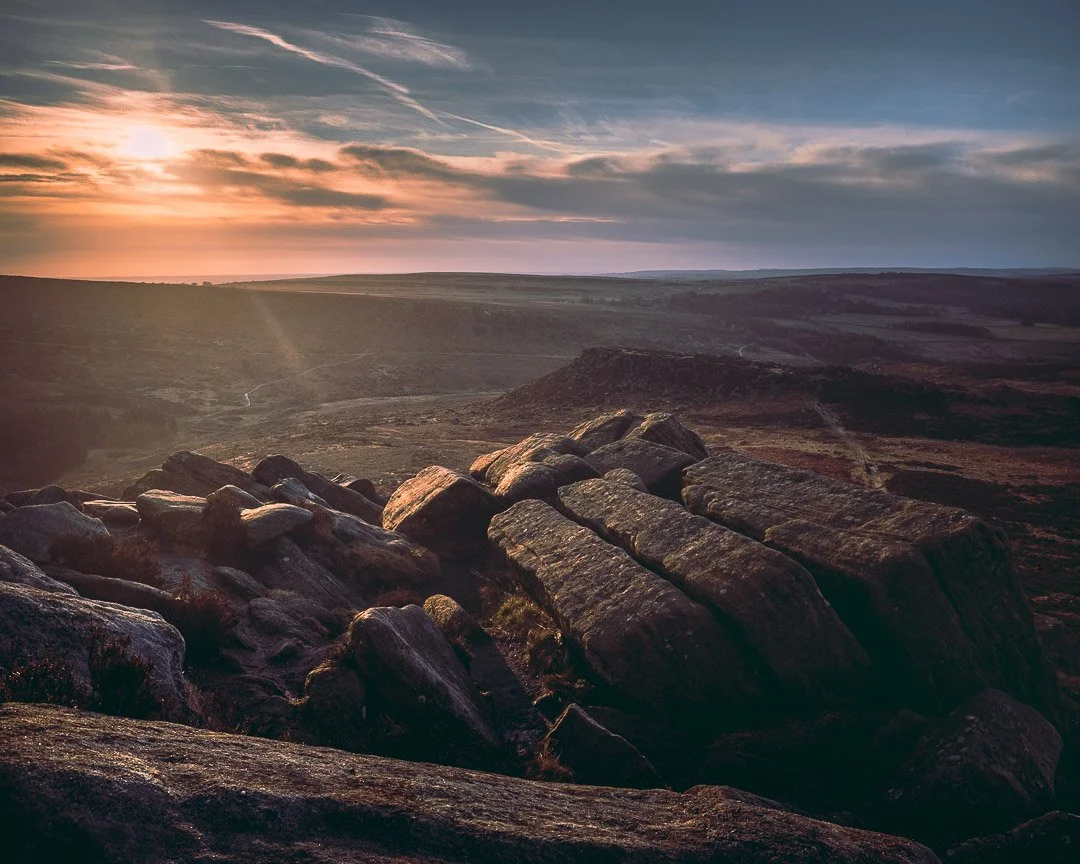
View from Higger Tor at Sunrise. Surprise View is on the right hand side and, lurking in the shadows beyond, is the top end of Padley Gorge
And yes, believe it or not, I actually do work haha! Much as I’d love it to, this landscape bit does not pay the bills. So photography for me is all about the work (honestly, I work more now than I ever did before starting this…easy 60-70 hour per week).
And sadly there aren’t really any short cuts in photography. All the gear in the world cannot get you a sunrise shot if you aren’t out before sunrise. The true photography hack is will power and hard work. And so it is that at 4.45am three times this week, I have been up. I’ve been out the door for 5.30am. I’ve been climbing the ascent at 7am. And I have battled the elements. And it was not easy.
…..But if you want the shot in landscape photography, you have to do it; you have to ‘graft for your craft’
Dave
If you are interested in seeing some of the ‘work’ that I get up to, you can click and check out: Bamber Photography & Film

Bird Photography with the Canon RF 800mm f11
This week I have been shooting primarily with the Canon RF 800mm f/11. This compact (for an 800mm) form prime lens comes with 4 stops of image stabilisation (in conjunction with the Canon EOS R5 or R6) and a constant aperture of f/11.
1/1000th of a second at iso 6400
This week I have been shooting primarily with the Canon RF 800mm f/11. This compact (for an 800mm) form prime lens comes with 4 stops of image stabilisation (in conjunction with the Canon EOS R5 or R6) and a constant aperture of f/11.
1/640 at iso 20000
Having been loaned the RF 800mm f11 for a week by Canon UK, my main goal was to test it out under the grey skies of Manchester during winter….I have no real interest in purchasing a lens which can only really be used for a limited number of days each year. So with that light limiting aperture of f/11, seeing the results from typical Manchester conditions was a must.
Using the RF 800 in conjunction with the Canon EOS R6 the lens performs admirably. Even though I was having to ramp up the iso to what would have been unthinkable levels five years ago, I was still getting usable images (some of which you can see on this post). And that is all part of the deal here. Canon have been able to develop and put out this RF mount 800mm lens at a light limiting fixed aperture of f/11 due to the ability of their mirrorless technology and the performance of their R series full frame sensors at high iso.
That being said though, increasing the iso will never be a replacement for getting more light into your camera. Capturing birds in flight means shutter speeds of 1250th - 2000th of a second. And at 11 stops, light is considerably limited. At this price point though, it is the only option and is workable…..the next step up is the Canon 800mm f/5.6 which runs at an eye watering cost of £13,000!!
So f/11 at £900 it is then!
(You can find the latest price for the Canon Rf 800mm f/11 on Amazon: https://amzn.to/3W4nTKi)
During the course of the day I found that the camera iso was quite often up at 25,600 and even hit 51,200 for a couple of shots. These types of grey sky, dim light shooting conditions will never produce perfect photography (you can't beat the physics) and the shots at the 51,200 iso range are lacking in detail. But showing those images through on my You Tube channel, at 4k, the reception to them was nevertheless pretty good.....the compressions helping to make up for any loss of detail, horses for courses then.


Would these shots hold up as prints? Well, I wouldn’t print these type of shots, purposely taken on a grey overcast day, but as a test, I printed the Robin at iso 20,000 shown further up the page at A4 and it was more than acceptable. Better shots will come with better light, and it would be those types of photograph that I would print.

The Canon RF 800mm f11 starts out small and compact for stowing away but extends into this position for shooting.
The other downside the constant aperture of f/11 on the Canon RF 800mm presents is in its auto focus. The Canon R5 and R6 have splendid auto focus and the R6 did a great job throughout. However, due to the aperture, auto focus is limited to the centre area only. This is due to the physics of the lens. The camera can’t focus on areas it can’t directly see.
So in conclusion did the Canon RF 800mm f11 pass the test? Well yes and no. It is certainly usable and whilst f/11 is restrictive, for the price point, it is worth it.
However, I found that the focal range was, at times, a bit too much for this use. Bird photography is definitely not much more than an enjoyable past-time for me. My usage would likely be a quick trip to my local bird sanctuary, rather than anything any more exotic. And so getting fairly close to the wildlife is not too much of a problem.

1/250th at iso 8000
Maybe a focal length of 600mm, of which there is also a fixed f/11 Canon RF lens, may prove to be a better option for me. Thankfully I have that on the way to try out in the next few weeks, which will give me ample time to test out that theory.
One things for certain, I'm no longer too worried about the f/11 aspect of these RF lenses.
You can see the lens in action for yourselves here: Canon's 800mm BEAST | shooting f11 on the Canon R6 - YouTube
Dave
Links to products on this site are well researched and usually something I own, or have extensively used and heartily recommend. As an Amazon Associate, I earn from qualifying purchases made via these links, however this is at no additional cost for you (and we’re talking pennies not pounds!). Any purchase made via these links helps to support the upkeep of this site and the information it provides.
Ads appearing on these pages are not affiliated and are provided by Google. Again, these appear to help support the upkeep of this site and the information it provides.

What is Photography?
every image ever captured by way of a camera did the first part of photography really well: it captured light and produced an image of that moment in time. And, without understanding, you may think that that’s it, nothing more…..your work here is done!
But it is in the second half of the word photograph that the key is held, certainly if you are looking create more than just a ‘photo!’…..
What is photography? It’s a big question, and one that you will likely have your own personal thoughts about. In the literal sense though, it’s a relatively straight forward answer:
A Photograph is a ‘Light Drawing’; and the word Photography means ‘to draw with light’.
This isn’t opinion, it is the literal translation of the original word. The word first coined by Sir John Hershal circa 1839 which was derived from the Greek words ‘Phos’, which means light, and ‘Graphé’, which translates as drawing. So a photograph is a light drawing. And thinking about how a camera works, it makes complete sense really. The film/sensor is the canvas and the light is the ink. But does knowing this really matter?
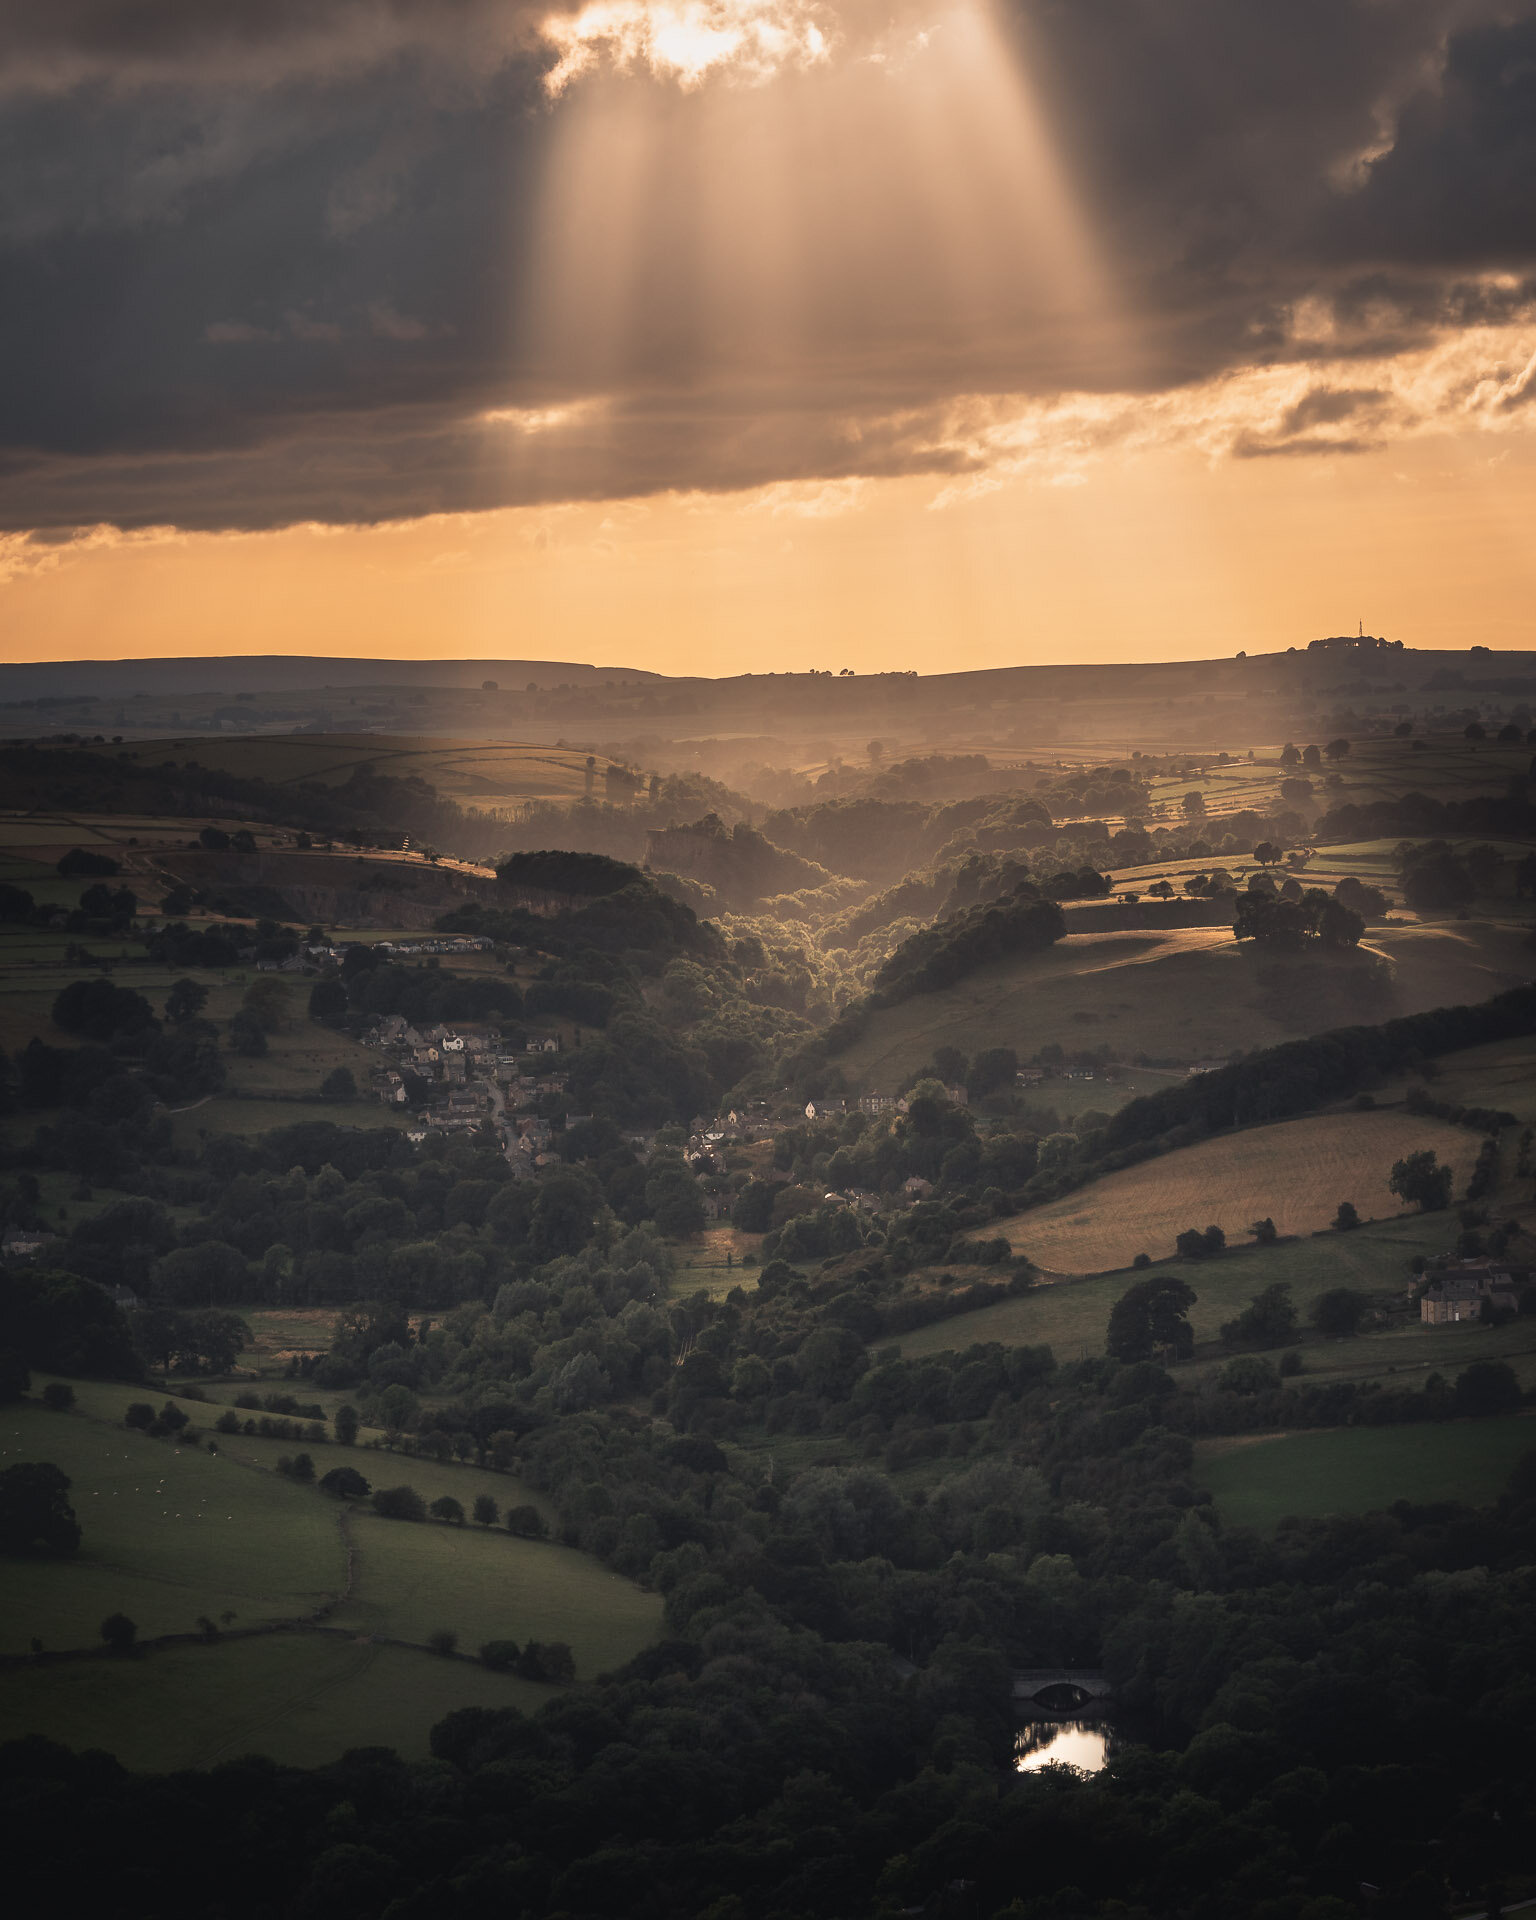
Drawing with light
Well I think it does. So much so that, now I have started to offer photography workshops again (YEY!!), I have incorporated this translation into the first module of all of the beginner-novice group workshops we offer (on sale now here). In fact, I think it is so important that it will likely also feature in the (soon to be announced) novice-hobbyist workshops too.
Why? Because it is my belief that understanding this basic fundamental of photography can immediately make you a better photographer.
How so?
Well, every image ever captured by way of a camera did the first part of photography really well: it captured light and produced an image of that moment in time. And, without understanding, you may think that that’s it, nothing more…..your work here is done!
But it is in the second half of the word photograph that the key is held, if you are looking create more than just a ‘photo!’…..
And I purposely use the term ‘photo’ here. You see, in the era of digital photography (and certainly now that high quality mobile phone cameras are carried everywhere, ready to snap at a seconds notice), there has been a rise in photographers using different terms to describe photography. You’ll no doubt have heard someone using the term ‘snapshot’ or possibly using the phrase ‘it’s just a photo/snapshot’.
Well, whilst these slang terms for photography have been around for a long time, over the last 20 years they have started to become a description of the image itself. ‘Snapshot’ or ‘photo’ are now commonly used to describe images with no (or minimal) artistic intent*. Shots taken without real purpose.
Back in the days of film, there was less inclination to take a shot without purpose. It was so darn expensive, each exposure cost money. But of course now, once we have our initial equipment, there is no added (immediate) cost to any of us. Whether we take one shot or one hundred. And this has brought rise to millions, if not billions of images being captured each day (over 1000 uploads to Instagram per second - 86 million per day!…..and that’s just Instagram).
And so, pretentiousness aside, there probably is a need to have some differentials. Surely not all of those images could possibly have had artistic intent in the truest sense of the word photography?
Let’s face it, we can all pick up a pencil, grab a piece of paper and draw something. But would we then consider ourselves artists? Would we consider that drawing a ‘work of art’? Probably not. It’s a drawing, and there may well have been some artistic intent in it, but is it art? Or is it a sketch…possibly a doodle?
Unless we are serious about our drawings we are unlikely to call them art. But everybody who can point a digital camera at something gets to refer to the ensuing image as photography!

The Paper and The Pencil
So, we go back to that literal translation in order to start to understand one of the key fundamentals of photography as more than just a ‘snapshot’.
If all you are doing is capturing light with your camera sensor, and negating the ‘drawing’ or art part of the medium, then there is no reason for adding the ‘graph’. The art of photography is contained within the second half of the word. Graph: The drawing. The choosing of how you want the light that you are capturing to look. How you want it to be captured on your camera sensor/film. How you present it through the medium of your image.
So we cover it in our workshops as this fundamental idea can make you think about how you wield your camera rather differently. You can start to look at the light differently. And by doing so, you can then start to choose how the camera sees the light; you can start to choose how you will translate that light from the 3d world onto your 2D canvas; you can sculpt with it.
So this immediately helps you become a better photographer. By taking that translation, by considering it, and by applying it, you have immediately added some artistry, you have added intent, you have begun your drawing.
Your journey from capturing snaps to creating art has begun.
You can book your workshop with us by clicking here
Dave Laffan
Let’s Click Photography.
*It is important to note that journalists and documentarians have been capturing images in this way since the very first camera, and rightly so too. Art is not a requirement for the capturing of a fleeting moment in time or historical event. For example, the journalists that documented the storming of the Capitol building in Washington (U.S.A.) in 2020, did not have time (or reason) to wait for the right light to pass overhead…..the angry mob were not waiting for photographers to find a nice leading line or to study the shadows falling over the ground. There is nothing wrong in documenting a moment in time without artist concern, if that is the requirement of that moment. Although in choosing to put aside the artistic intent, one could argue that it becomes artistic through that choice ;)